Invoice Settings
-
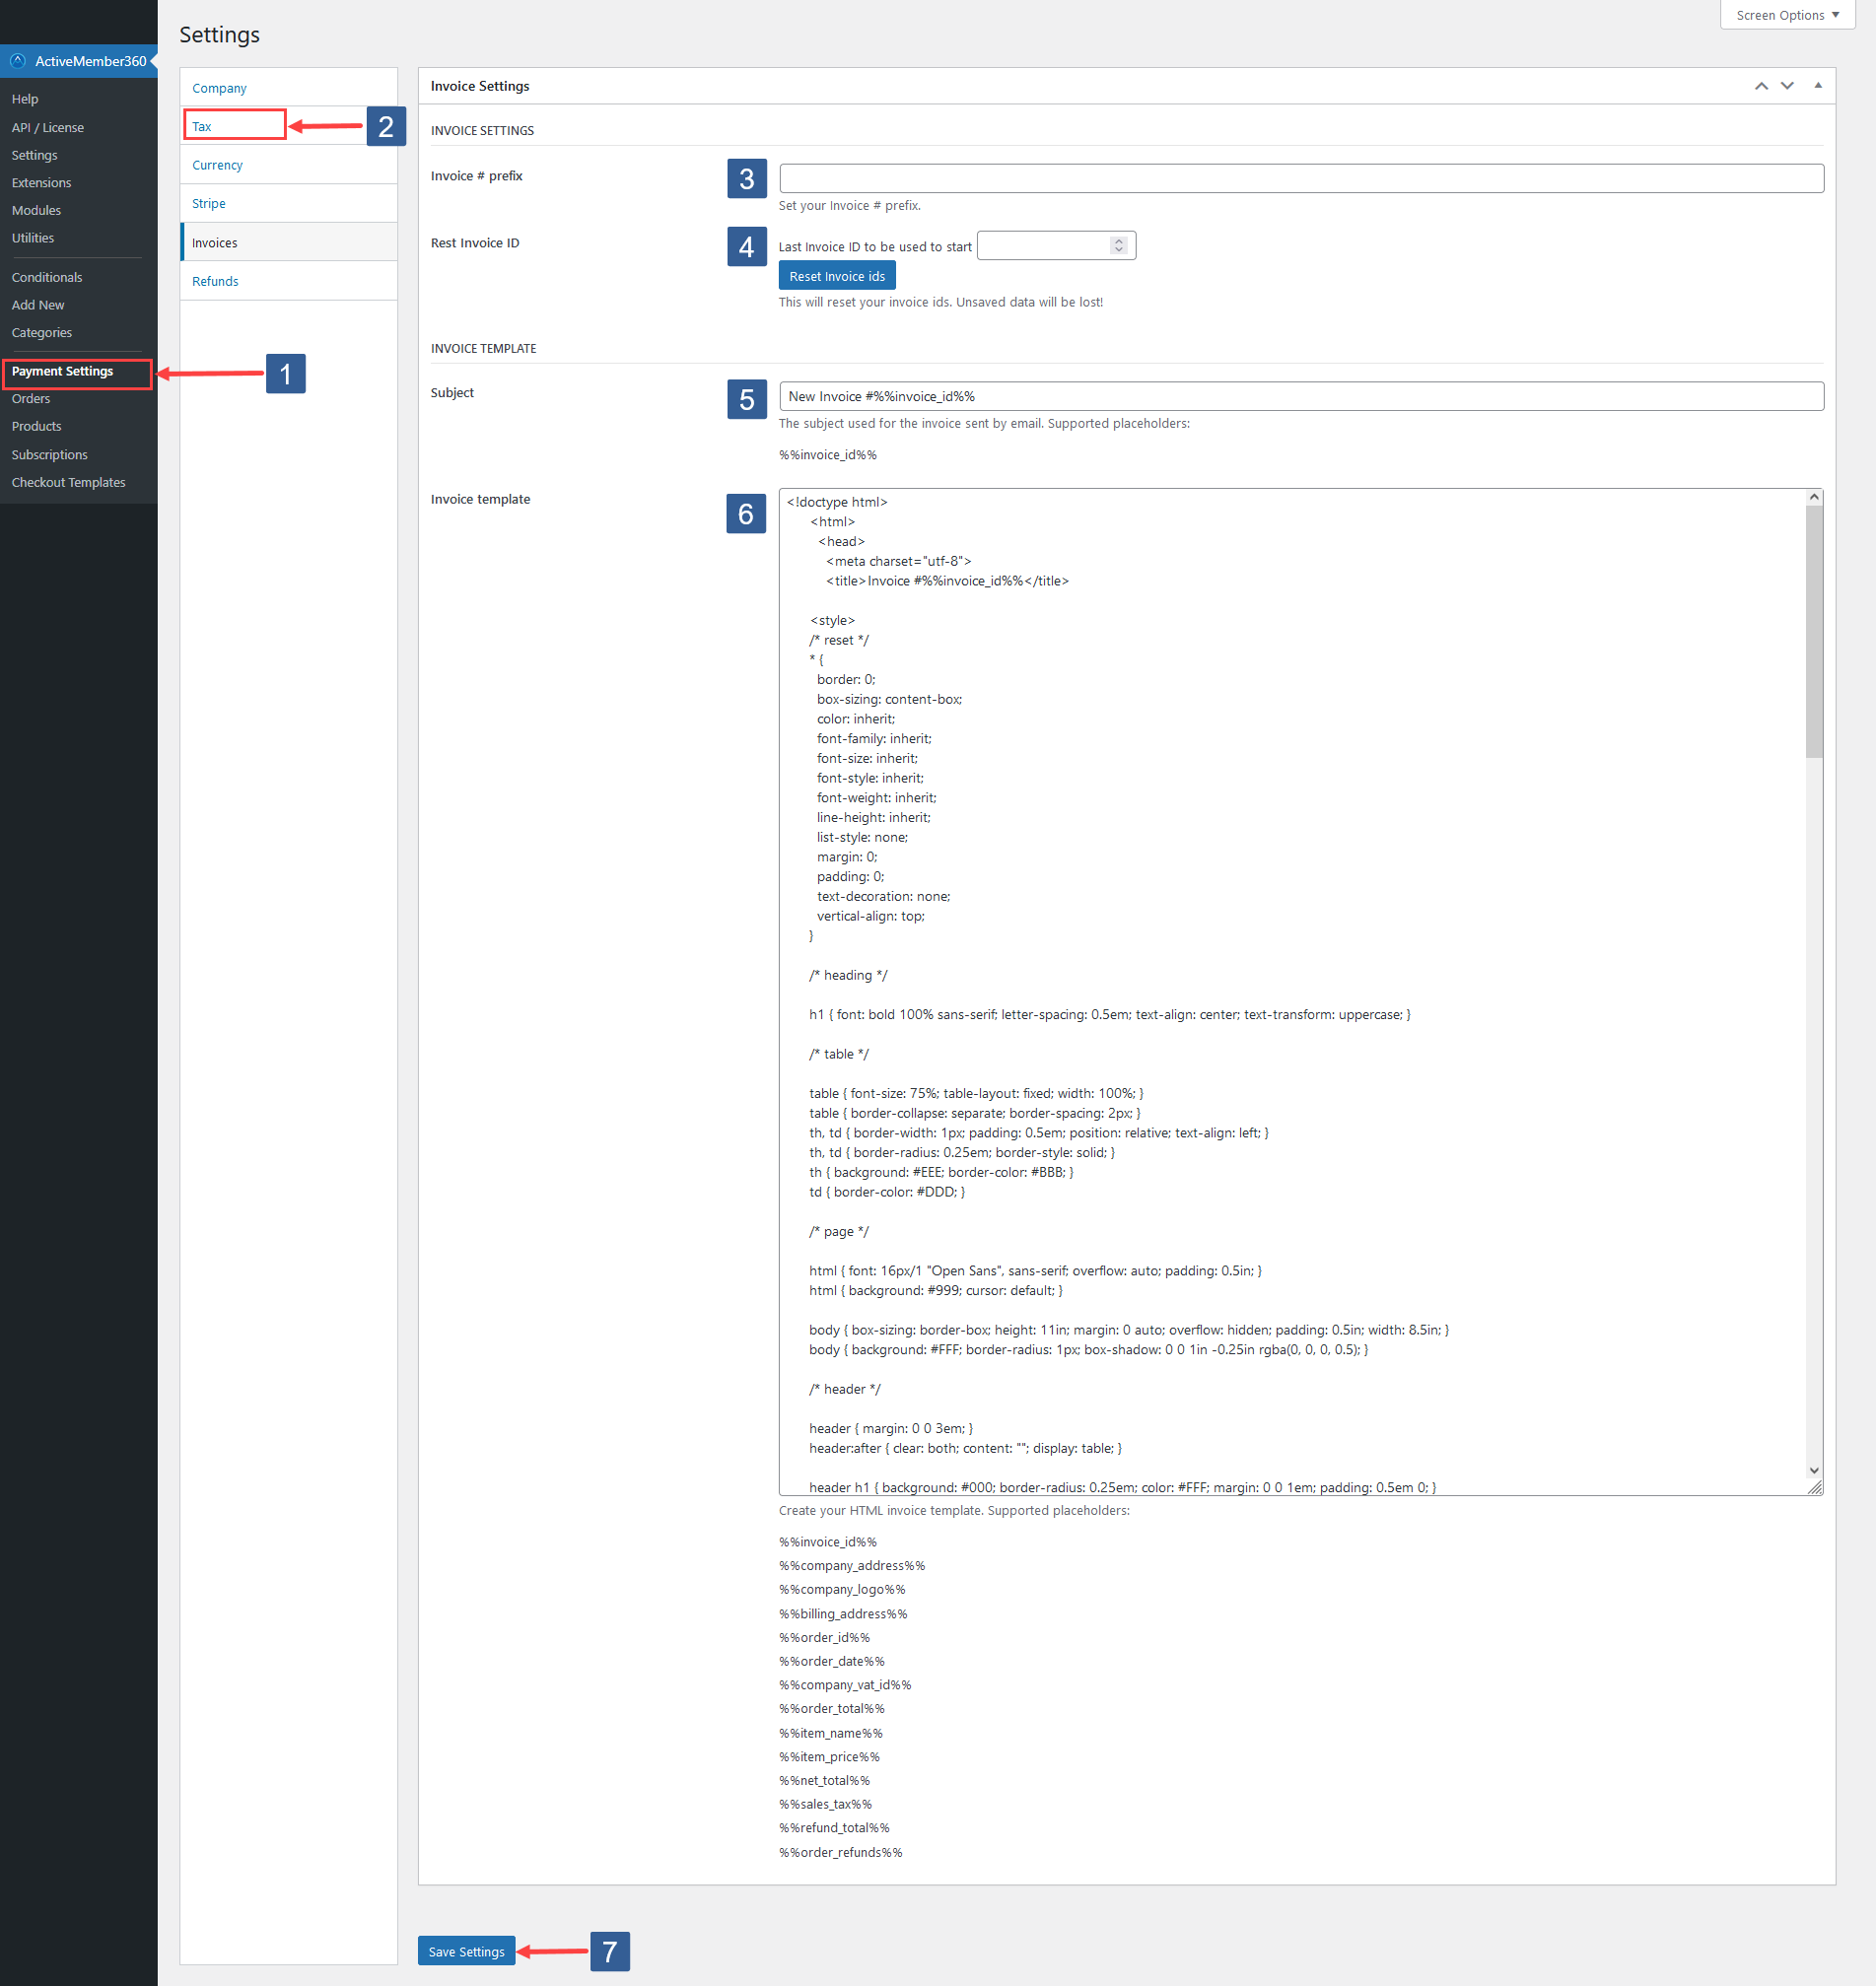
In WordPress administrator main navigation click ActiveMember360, Payment Settings.
-
In ActiveMember360 Payment Settings tabs click Invoices.
-
Enter your optional Invoice ID prefix.
For example entering
AM360-will result in invoices and refund receipts having an identifier such as AM360-1 or AM360-1234 i.e. the Invoice ID prefix followed by the unique invoice ID number.Leave the Invoice ID prefix empty if an invoice/refund prefix is not needed.
-
Invoices IDs are created sequentially starting with an ID of 1.
If you want the next invoice ID to be created to be a specific integer value select that value less 1 as the Reset Invoice ID then click on the button labelled Reset Invoice IDs.
For example If you wish to reset your invoice IDs after testing and you need to restart with invoice ID 1, enter 0.
ImportantClicking on the button labelled Reset Invoice IDs will lose any unsaved changes.
Please ensure that you have clicked on Save Settings prior to clicking on the button labelled Reset Invoice IDs.
-
Enter your chosen Subject used for all invoice emails.
You can use the following placeholders to pull invoice data dynamically into the email subject:
- %%invoice_id%%
-
In Invoice Template enter your own template HTML/CSS for your invoices or adjust that provided to your own needs.
This HTML/CSS will be used in the invoice emails sent to your customers as well as for those displayed within ActiveMember360.
You can use the following placeholders to pull invoice data dynamically into your template:
- %%invoice_id%%
- %%company_address%%
- %%company_logo%%
- %%billing_address%%
- %%order_id%%
- %%order_date%%
- %%company_vat_id%%
- %%order_total%%
- %%item_name%%
- %%item_price%%
- %%net_total%%
- %%sales_tax%%
- %%refund_total%%
- %%order_refunds%%
-
Click Save Settings.