Alternate Membership Menus
Overview
Dependent upon the theme you use with your WordPress installation there may be a number of WordPress menus available.
Typically the theme wil control how many WordPress menus you can define.
The purpose of the ActiveMember360 Alternate Membership Menus module is to allow any defined menu to be associated with an ActiveMember360 Membership.
Any menu associated to a specific membership will only be shown to logged in members that have the ActiveCampaign tag used to define the associated membership.
So for example, on a site with multiple memberships a different menu could be shown to each logged in user, dependent upon which membership they belong to.
Unlike the ActiveMember360 Menu Control Module which controls the visibility of individual menu items, Alternate Membership Menus controls the visibility of the entire menu.
Activate Alternate Membership Menus Module
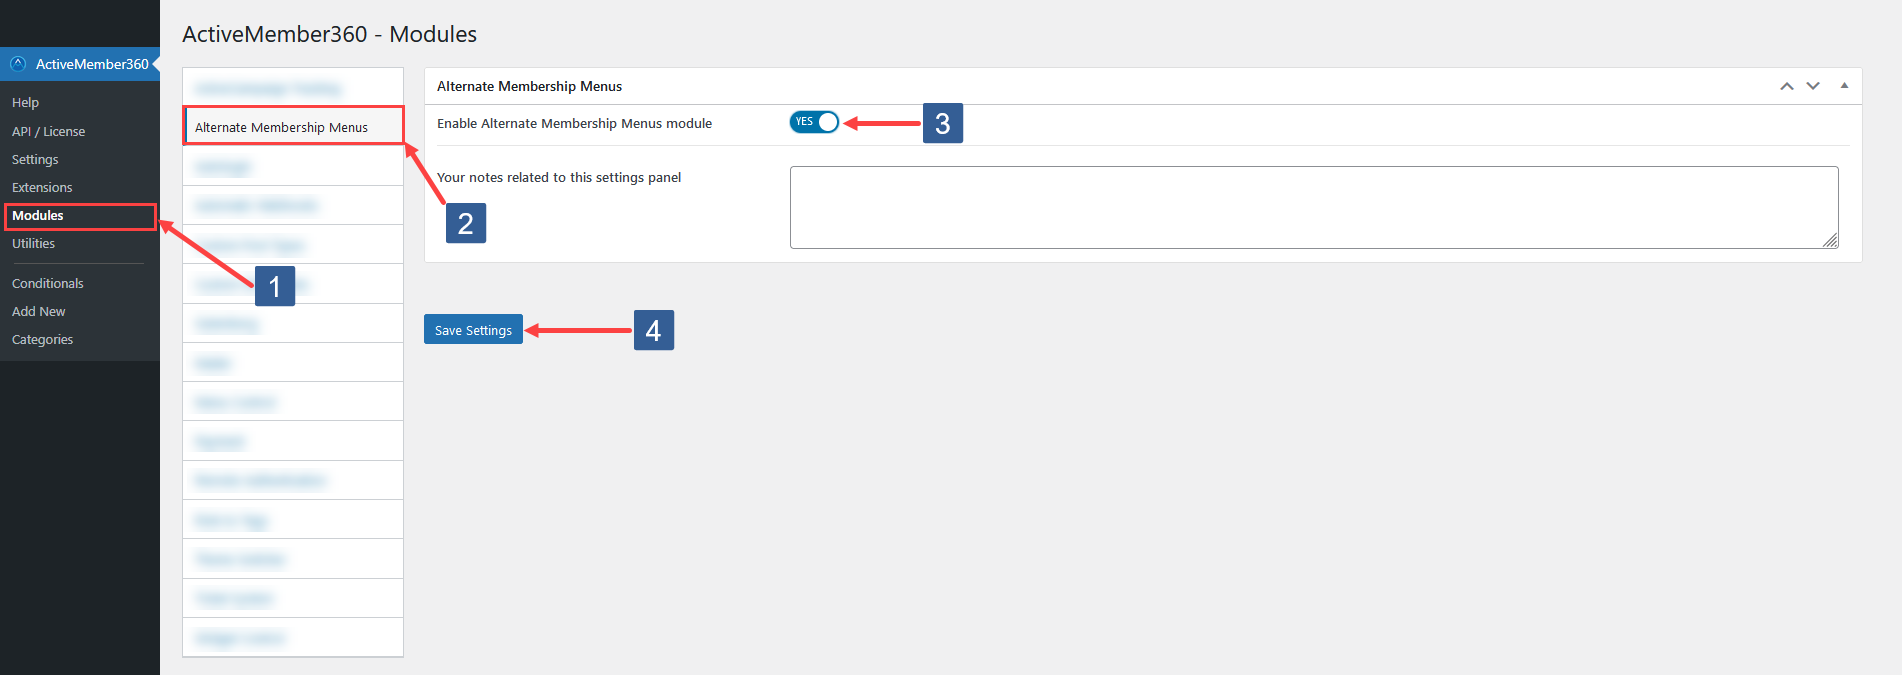
- In the WordPress administrator main navigation click ActiveMember360, Modules.
- In ActiveMember360 Modules tabs click Alternate Membership Menus.
- Set Enable Alternate Membership Menus module to Yes/On.
- Click Save Settings.
Assigning Menus To Memberships
You can assign a menu to a membership in two different ways:
Assigning The Menu To A Membership When Editing The Menu

Steps to assign the menu to a membership when editing the menu
-
In the WordPress administrator main navigation click Appearance, Menus.
-
Select the Edit Menus tab.
-
From the Select a menu to edit drop down select the menu to be assigned to memberships or create a new menu.
-
In the Menu Settings, Display Location select the menu locations and memberships where this menu should be used.
Discrete selections will always override the default selection.
-
Click Save Menu to save your configuration.
Assigning Menus To Memberships When Managing Locations

Steps to assign menus to memberships when managing locations
-
In the WordPress administrator main navigation click Appearance, Menus.
-
Select the Manage Locations tab.
-
For each membership listed click the Assigned Menu drop down and select the required menu for that membership.
-
Click Save Changes to save your configuration.
Where a logged in user holds multiple memberships the menu shown is determined by the membership order. The first membership in the list which has a menu assigned which is not the default setting will be shown for that user.
You can control the order of the memberships as explained at ActiveMember360, Settings, Memberships.
The default menu will apply if none of the memberships have an assigned menu.