Company Settings
-
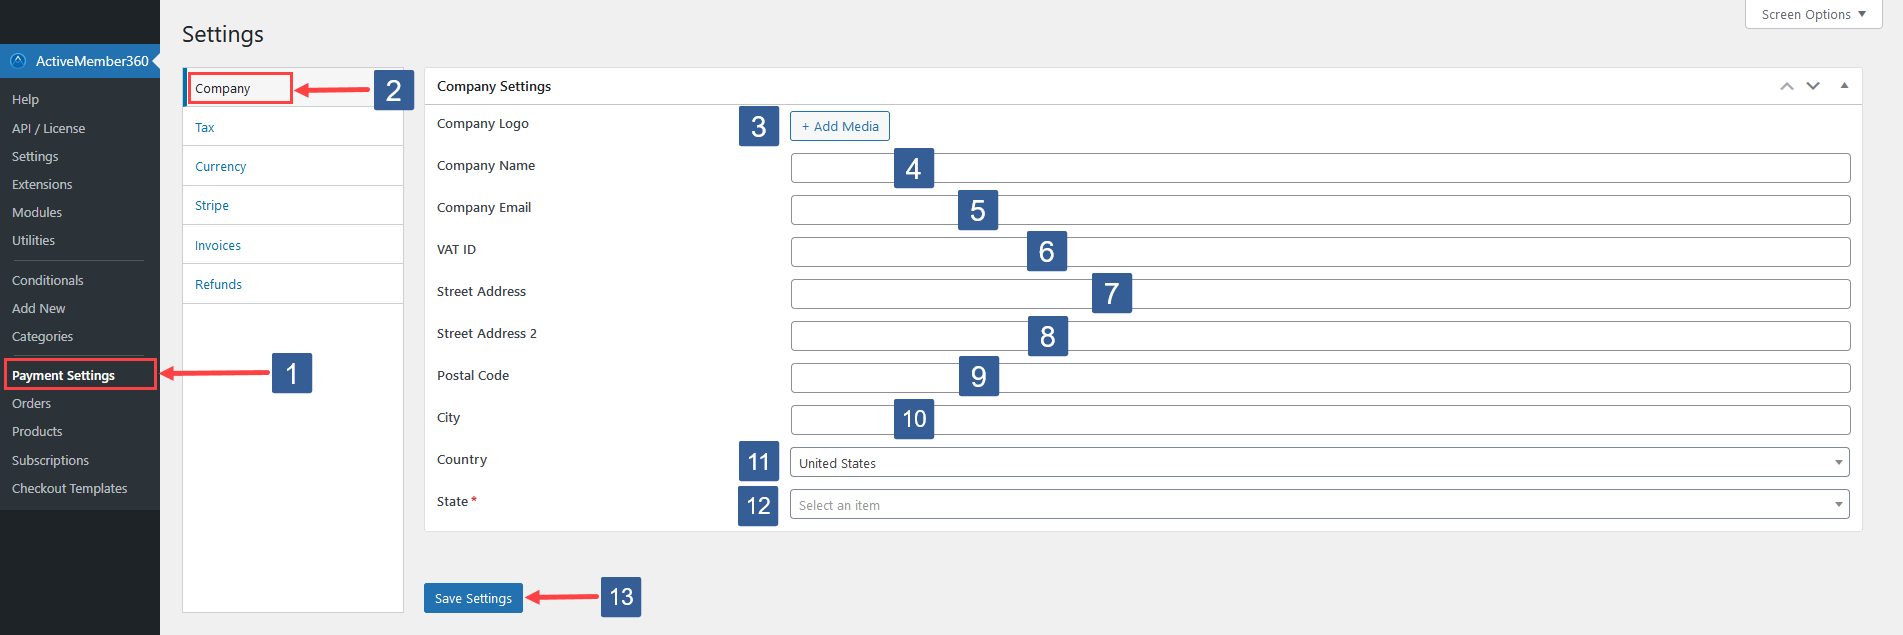
In WordPress administrator main navigation click ActiveMember360, Payment Settings.
-
In ActiveMember360 Payment Settings tabs click Company.
-
Upload or choose your Company Logo to appear on invoices and refund receipts.
-
Enter your Company Name.
-
Enter your Company Email address.
-
Enter your VAT ID if required for invoices.
-
Enter your Street Address.
-
Enter your Street Address 2.
-
Enter your Postal/Zip Code.
-
Enter your City.
-
Select your Country from the dropdown.
ImportantIf charging sales tax it is the country chosen here that determines if tax is payable by a purchaser.
-
Select your State from the dropdown. This field will only show if you have chosen United States in the previous step otherwise, this field will not be shown.
ImportantIf charging sales tax it is the state chosen here that determines if tax is payable by a purchaser.
-
Click Save Settings.
The information provided in steps 3 to 12 can be displayed using placeholders within your invoices and refund receipts, see ActiveMember360, Payments, Settings, Invoices and ActiveMember360, Payments, Settings, Refunds.