Checkout Templates
ActiveMember360 Payment module checkout templates are a WordPress custom post type.
Adding and managing checkout templates is done in exactly the same way as with any standard WordPress post/page.
Checkout templates can be listed, created, and managed from the WordPress administrator main navigation.
Prior to configuring any products or subscriptions you must define a checkout template.
It is required when configuring products or subscriptions.
Adding Checkout Templates
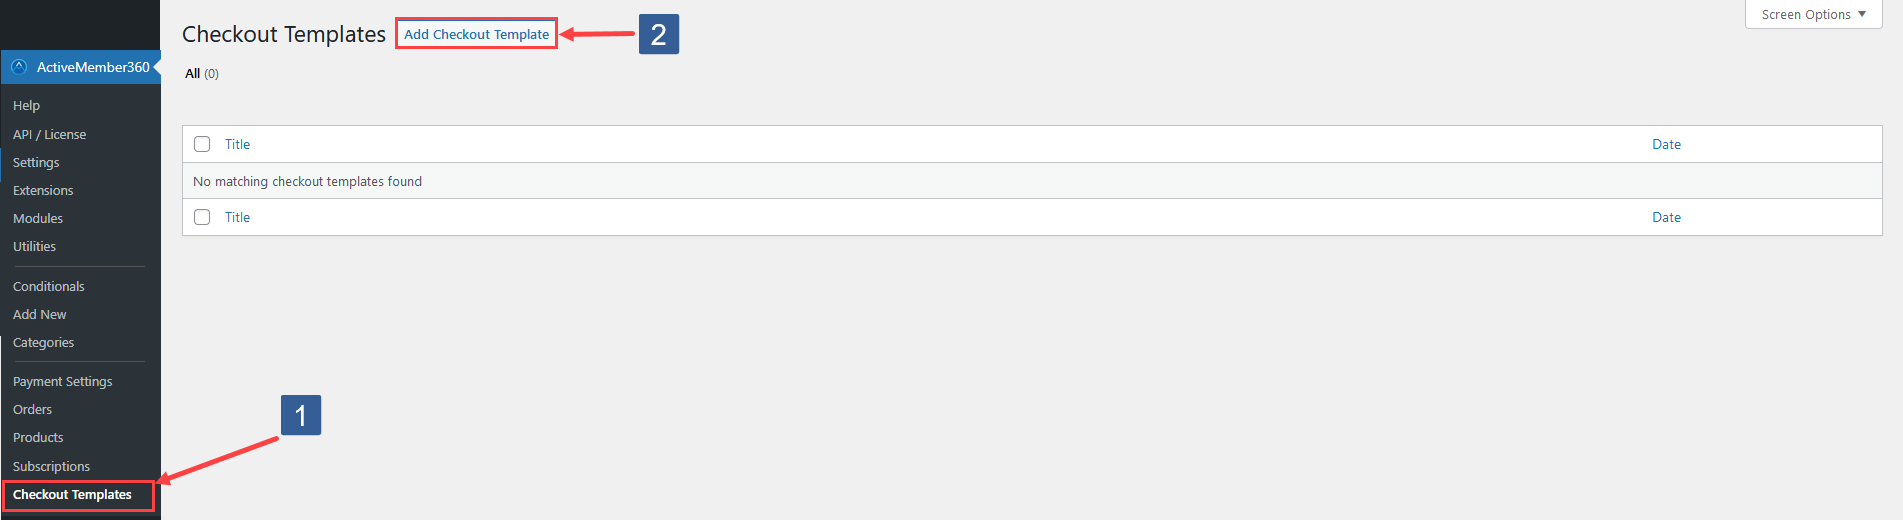
- In WordPress administrator main navigation click ActiveMember360, Checkout Templates.
- Click Add Checkout Template.
Steps to define Payment Module checkout template layout
-
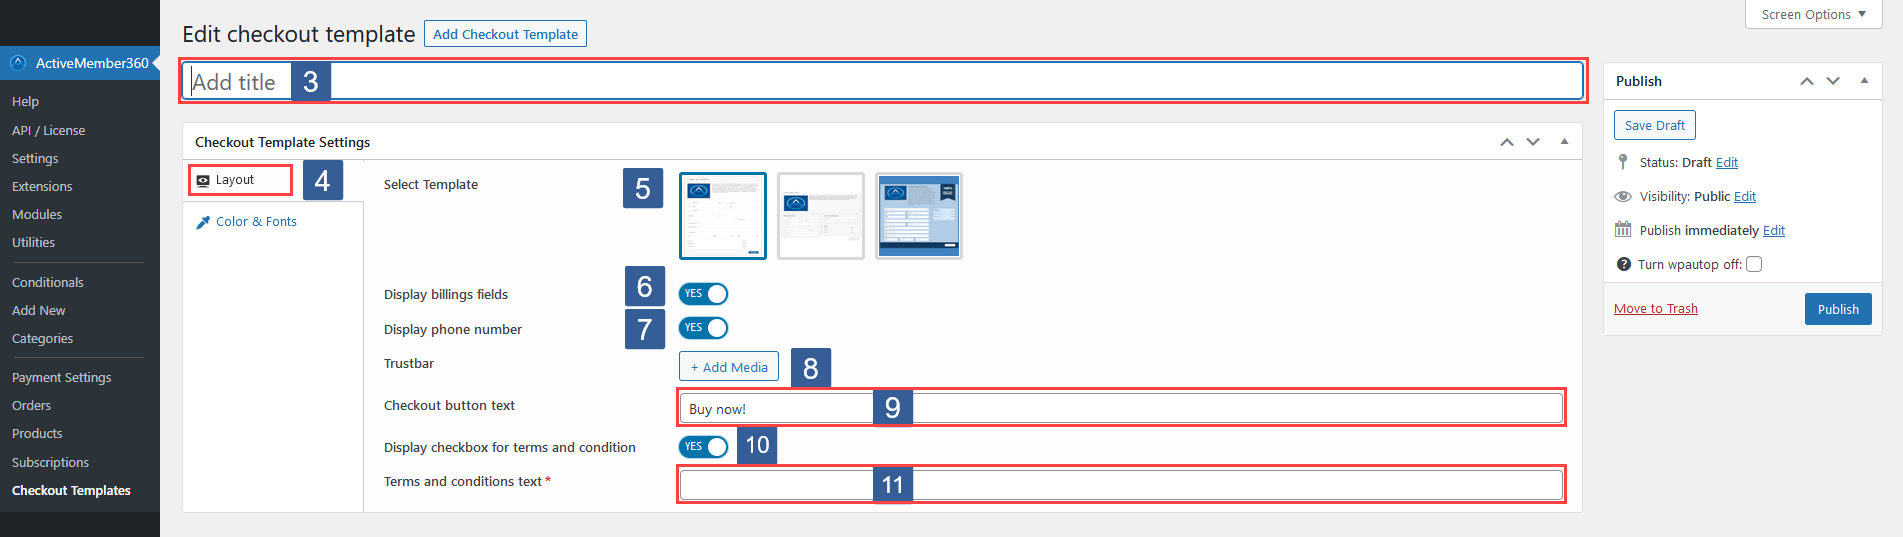
Enter your Checkout Template Title. This is an internal title for identification purposes only.
-
In ActiveMember360 Checkout Template Settings tabs click Layout.
-
Chose for Select template one of the three predefined templates.
-
Set Display billing fields to On if the billing fields such as street address, country etc are to be shown in the checkout form and are required inputs from the customer.
ImportantNo sales tax can be calculated and collected at checkout if the billing fields are not shown. Nor if the checkout is being completed by a logged in user whose country/state is unknown.
-
Set Display Phone number to On if the phone number is to be shown in the checkout form and is a required input from the customer.
-
Upload or choose a Trustbar image if required.
This could be a guarantee image, credit card logos, or any combination of any desired information.
-
Specify the Checkout button text.
-
Set Display checkbox for terms and conditions to On if you wish to display a checkbow to agree to terms and conditions.
-
This field is only shown if Display checkbox for terms and conditions is set to On.
Specify the Terms and Conditions text.
Steps to define Payment Module checkout template colors and font
-
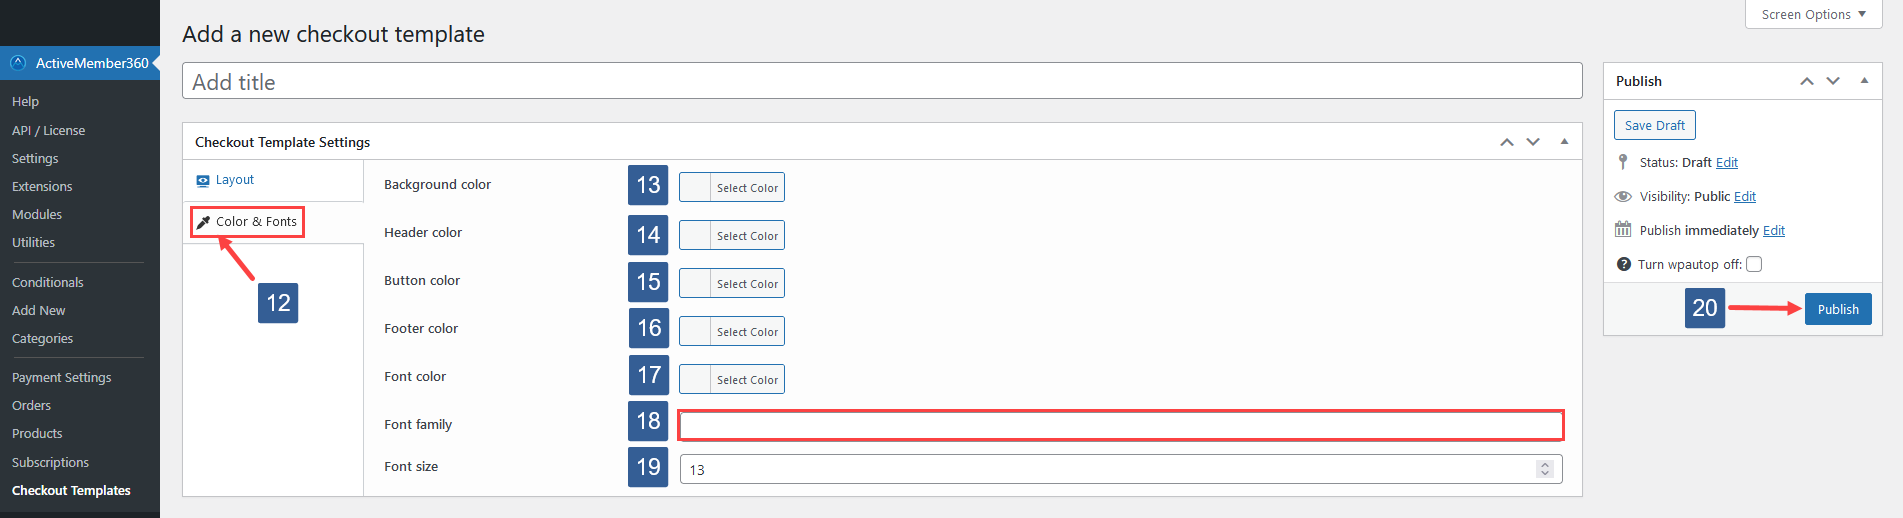
In ActiveMember360 Checkout Template Settings tabs click Color & Fonts.
-
Select a Background color using the color picker to override the defaults for your template.
-
Select a Header color using the color picker to override the defaults for your template.
-
Select a Button color using the color picker to override the defaults for your template.
-
Select a Footer color using the color picker to override the defaults for your template.
-
Select a Font color using the color picker to override the defaults for your template.
-
Enter a Font family to override the default font of your chosen template.
This can be the name of any available web font for example Arial or Verdana.
-
Select a Font size to override the default of 13px for your template.
-
Click Publish.
Editing & Deleting Checkout Templates
-
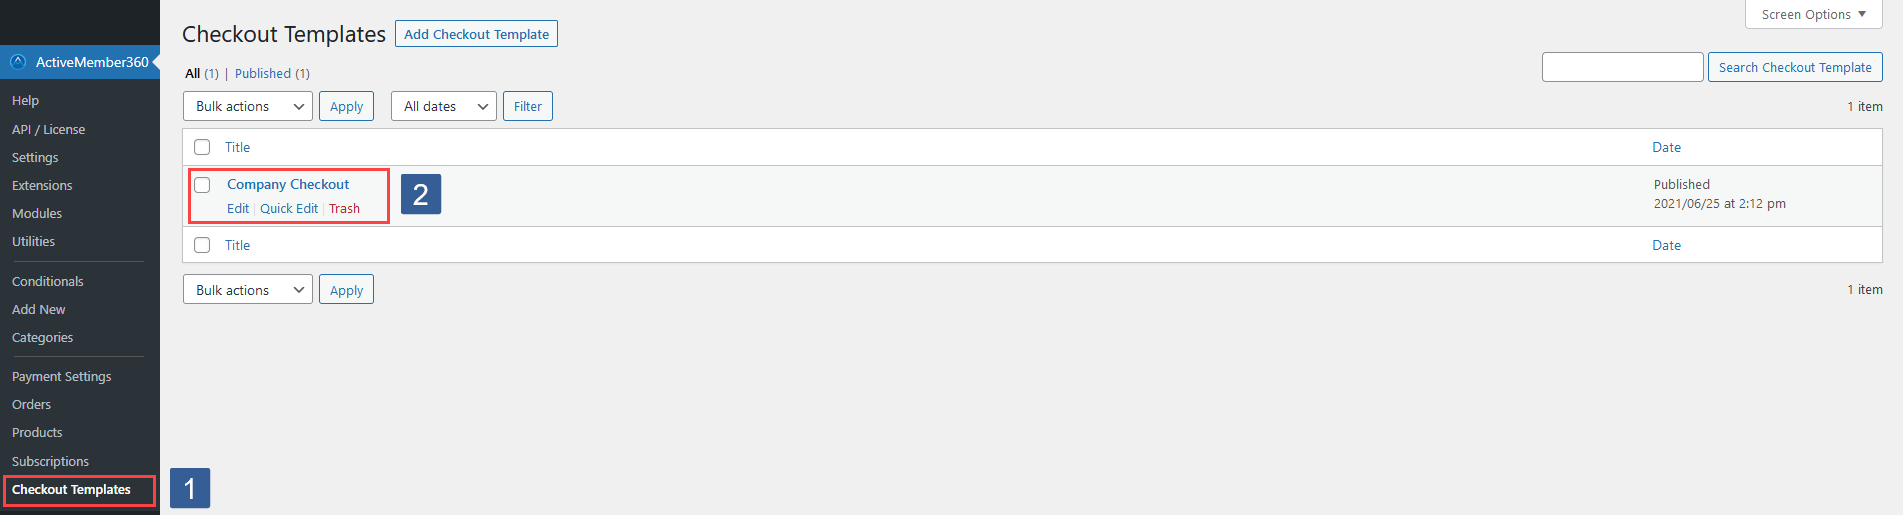
In WordPress administrator main navigation click ActiveMember360, Checkout Templates.
-
When you hover over a checkout template in the listing you will see the links to edit and trash (delete) the checkout template.
ImportantIf you delete a checkout template any product or subscription that uses the deleted template will now longer show a checkout.
Please ensure that if you chose to delete a checkout template you specify an alternative for any product or subscription where it is used.