First Steps
To help you get started and to understand the basics of ActiveMember360 we suggest you perform the following workflow which also includes the installation of ActiveMember360.
Please ensure that after completing Setup and Test that you review Overview & Summary to ensure that you have a fuller understanding of the Setup and Test processes.
Setup
-
Confirm that the prerequsites for using ActiveMember360 as detailed within Installation Prerequisites are satisfied.
-
Install ActiveMember360 as detailed within Installing ActiveMember360.
We would recommend that you do not install immediately upon a live site that is currently serving your clients.
We would recommend you initially use a development or staging site to become familiar with how ActiveMember360 operates and how you wish to configure your site for use with ActiveMember360 before deploying to your live site.
-
Connect ActiveMember360 to your ActiveCamapign application as detailed within Connecting ActiveMember360 To Your ActiveCampaign API.
-
Verify your ActiveMember360 license as detailed within Verifying Your ActiveMember360 License.
-
Within ActiveCampaign create two contact tags that will be used to define an ActiveMember360 membership.
You can name these however you wish on the basis that one will define the membership, and the other will indicate a failed payment status for that membership.
How to create tags is detailed within the ActiveCampaign article Managing Tags with the Tag Manager.
In our example below the tags are named
PremiumandPremium Failed Payment.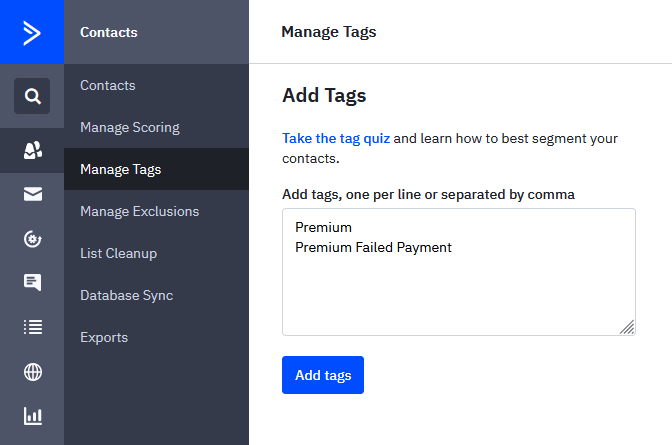
-
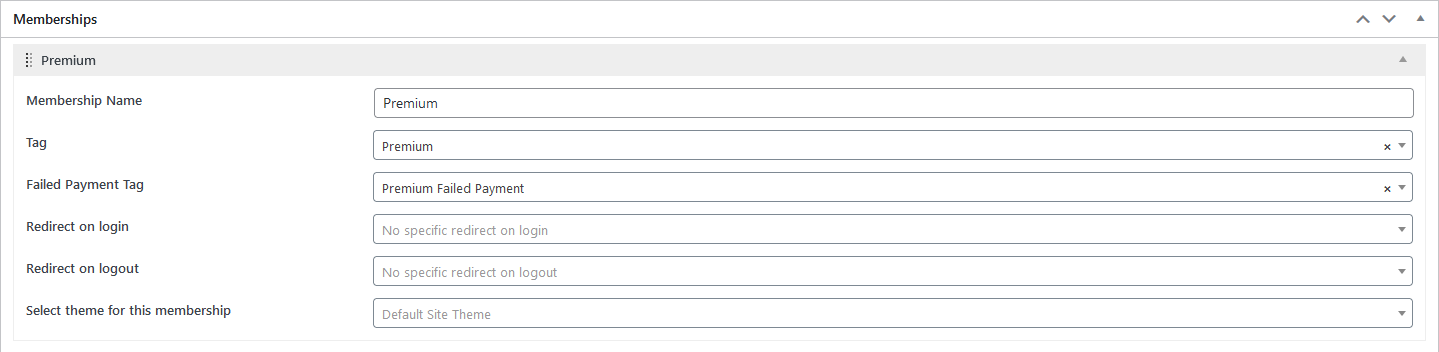
Using the tags defined in the previous step setup an ActiveMember360 membership as detailed within ActiveMember360, Settings, Memberships.
In our example below we show the settings for a membership named Premium using the example tags from the previous step.
-
Create a page in your WordPress site and on that page place the following content:
Welcome, [mbr_db_first_name]. -
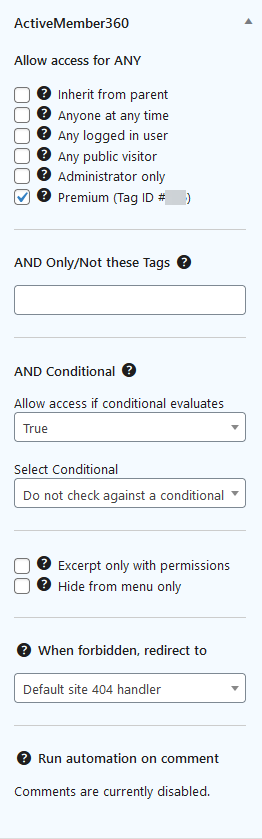
Edit that page and set the ActiveMember360 access settings to only allow access for the Membership as created in Setup step 6 above.
The process is as detailed within Set Page/Post Access Conditions specifically for the Membership Conditions.
In the example below we show the settings for the membership we created in Setup step 6.
-
No other configuration is required so currently leave all other ActiveMember360 settings as the defaults.
-
Option 1 - Create an ActiveCampaign automation that will send an email with the login credentials stored within ActiveCampaign
This option would be used when you are happy to send plain text passwords in an email.
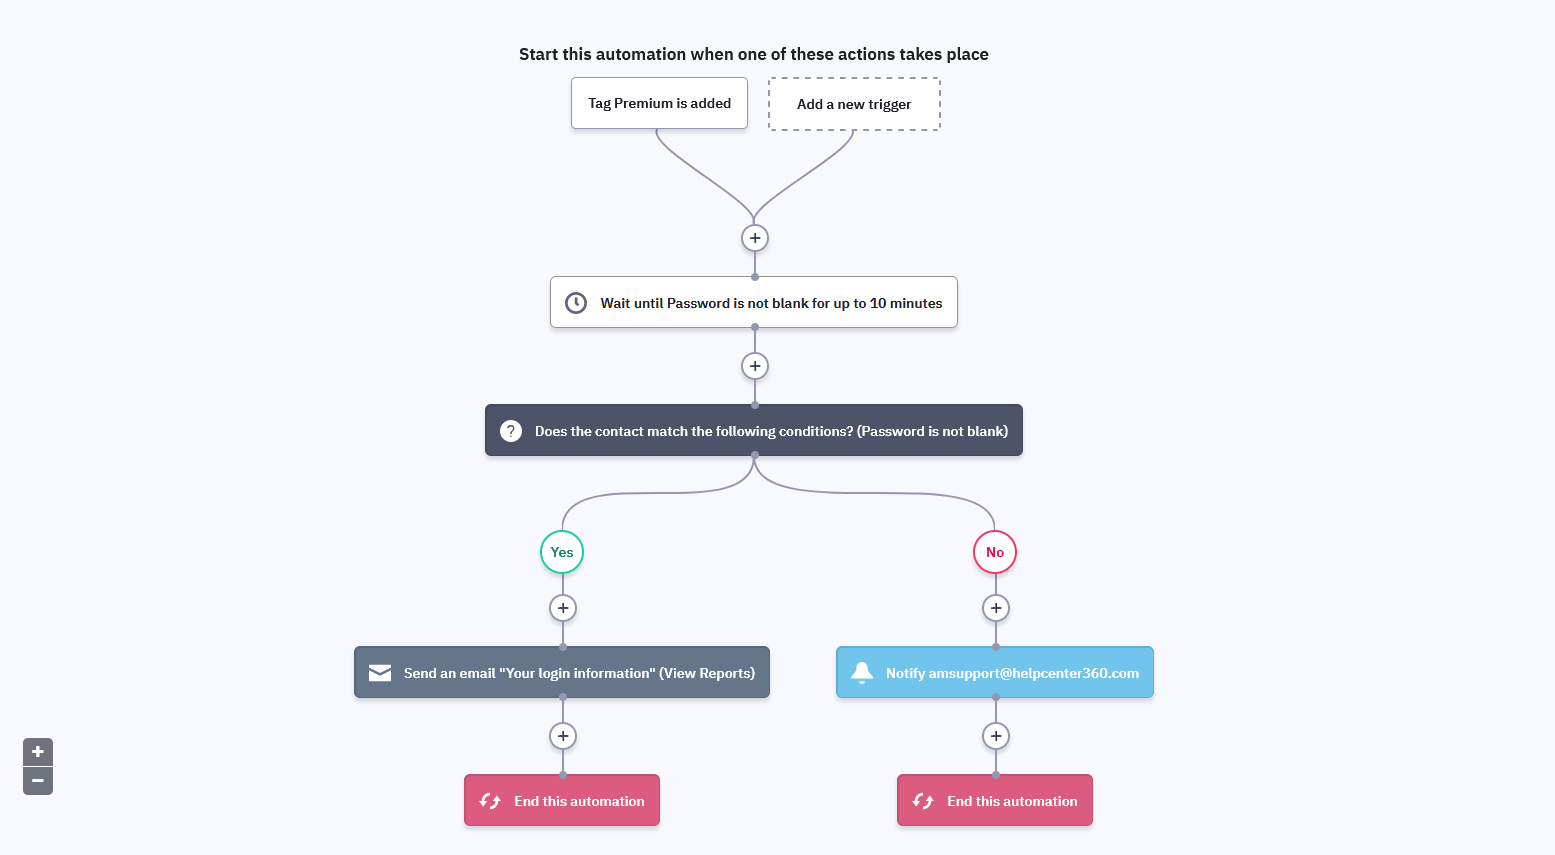
Below is a sample automation that you can replicate:
-
The automation is triggered by the adding of the membership tag.
-
Then there is a Wait condition until the Password contact field is not blank or 10 minutes have elapsed.
-
Then there is an If/Else condition determined by if the Password contact field is not blank.
-
If the Password contact field is not blank an email is then sent to the contact with their login credentials.
Within the email please ensure to include:
Email: %EMAIL%
Password: %PASSWORD% -
If the Password contact field is blank then an email notification is sent to the support desk for the blank password field to be remedied.
ImportantThis is a sample automation for testing.
The automation you use for a live site can contain whatever logic you wish however it should always send an email with the login credentials.
Option 2 - Create an ActiveCampaign automation that will send a welcome email and WordPress reset password email
This option would be used when you do not wish to send plain text passwords in an email.
Below is a sample automation that you can replicate:

-
The automation is triggered by the adding of the membership tag.
-
Then a welcome email is sent to the contact.
This would welcome the user, tell them an account has been set up for them, provide the login URL, and inform them they will receive another email that will let them set their password.
-
Then a webhook is executed which triggers the sending of a WordPress reset password email to the contact from WordPress.
Full details of how to implement this webhook are available at ActiveMember360, Webhooks, Contact Password Reset.
ImportantThis is a sample automation for testing.
The automation you use for a live site can contain whatever logic you wish however it should always send a welcome email and trigger the sending of a reset password email.
-
Test
-
From within ActiveCampaign add a new contact to your application that you will use for testing purposes. Ensure you specify a first name for the contact.
-
Once the contact has been added to your application search for the contact within ActiveCampaign.
Then add the membership tag that was defined is Setup step 5 to the contact.
-
Wait a few seconds and then refresh the page.
In the contact listing you should see a contact field named
Passwordwith a value shown next to it.See our example below:
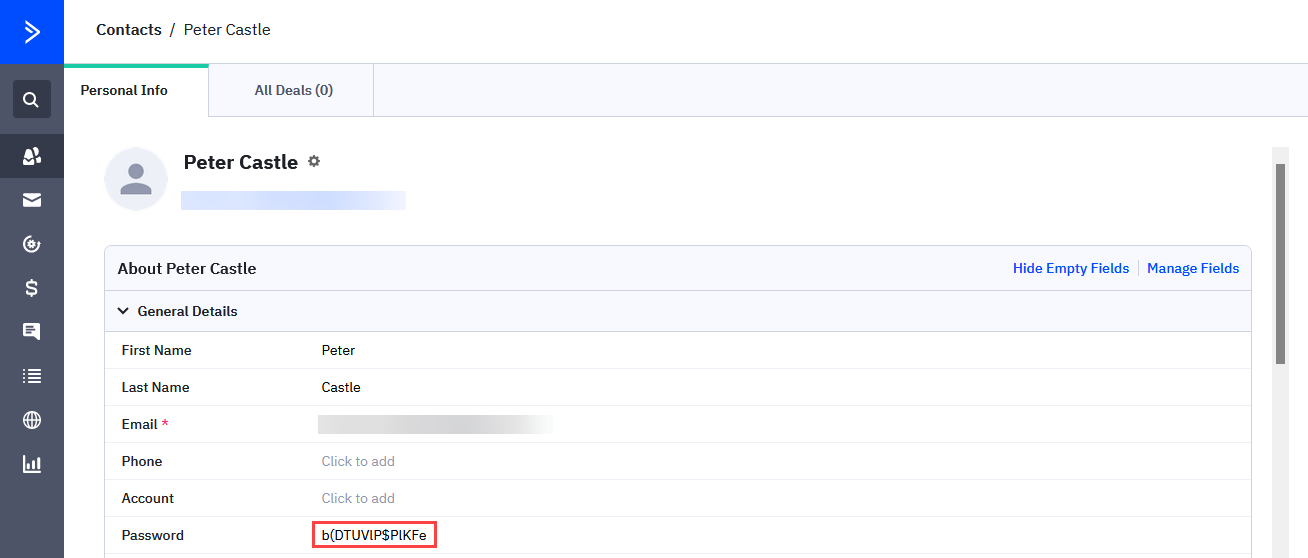
If no password is shown please refer to Troubleshooting The Automatic Webhook in order troubleshoot any issue with the webhook and HTTP POST.
-
Check the email inbox of your test contact to see if either the login credentials email, or the welcome email and WordPress reset password email, have been received.
-
In a new incognito browser window visit your WordPress site login page.
Typically: https://yoursite.com/wp-login.php
-
Enter the email address of your test contact and the password exactly as shown in ActiveCampaign.
-
You should then be logged in to your WordPress site and have been automatically redirected to the home page of the site.
-
Visit the URL of the page you defined in Setup step 7.
You should see the Welcome message showing the first name of your test contact.
-
Logout and then visit the page you defined in Setup step 7.
You should then see a 404 page for your site.
Overview & Summary
The Setup and Test steps performed in relation to how ActiveMember360 operates can be summarised as follows.
After installing ActiveMember360, upon completing a successful connection with your ActiveCampaign application ActiveMember360 automatically creates a contact field within ActiveCampaign named Password.
ActiveMember360 by default also automatically configures webhooks within ActiveCampaign so that either the creation of a contact, or changes to a contact record, causes the webhook to send data (a HTTP POST) to the ActiveMember360 powered WordPress site. That HTTP POST triggers ActiveMember360 to use WordPress to generate a password which is stored within WordPress and ActiveCampaign.
Consequently upon creation of a contact within ActiveCampaign, ActiveMember360 automatically creates a password for that contact and stores it in the contact field named Password if one does not already exist. ActiveMember360 will never overwrite an existing password in ActiveCampaign. As process is triggered by the HTTP POST sent by ActiveCampaign it relies upon that HTTP POST reaching WordPress and not being blocked by any firewall or security plugin/software.
The creation of an ActiveCampaign contact can be performed either:
- Manually
- Using an ActiveCampaign form
- Using third party form products/plugins that integrate with ActiveCampaign
- From e-commerce transactions processed by products that integrate with ActiveCampaign
- ActiveCampaign contact import
Once a contact exists, to give them access to your WordPress site you would add the appropriate tags to access the site (typically at least one of the tags used to define in WordPress ActiveMember360, Settings, Memberships. However within WordPress you can configure ActiveMember360 to allow access to the site without the need for any membership tags if you so wish. See WordPress admin, ActiveMember360, Settings, Login Settings, Allow login without a membership tag.
The adding of ActiveCampaign tags can either be performed during the contact creation or update process or from within an ActiveCampaign automation.
The process that triggers the webhook within ActiveCampaign should also be configured to trigger an automation within ActiveCampaign. So if using an ActiveCampaign form you would ensure that either the contact is tagged or added to a list to trigger an automation, if using an e-commerce solution ensure that a successful purchase triggers an automation, or if adding the contact manually also manually trigger an automation.
Within that automation you would typically either:
-
Send the login credentials for the WordPress site which includes the email address and password generated automatically by ActiveMember360.
The email and password data stored within ActiveCampaign are the master data and are those primarily used to validate a login to any WordPress site running ActiveMember360.
The content of the email sent from the automation should include the following to provide login details:
Your login URL
Email: %EMAIL%
Password: %PASSWORD%
The user is created in WordPress by ActiveMember360 automatically during their first successful login if they do not already exist, when they use the login credentials stored within ActiveCampaign. There is no need to use a WordPress registration process, nor for the user to exist in WordPress prior to that login. That login process also creates a connection between the WordPress user and the ActiveCampaign contact with the same email address.
or:
-
Send the welcome email for the WordPress site which includes the email address and trigger the sending of a WordPress reset password email which will create a WordPress user if they do not already exist.
When the visitor clicks on the link in the WordPress reset password email they will have the option to set their password.
The submitted password will be stored within WordPress and ActiveCampaign.
The email and password data stored within ActiveCampaign are the master data and are those primarily used to validate a login to any WordPress site running ActiveMember360.
After a successful login the user will have access to content for which they satisfy the ActiveMember360 Post/Page Access Conditions.
If a visitor or logged in user visits a page/post for which they do not satisfy the ActiveMember360 Post/Page Access Conditions by default they will be shown your 404 page.
Next Steps
Now that you have a basic understanding of how ActiveMember360 functions we recommend you review Next Steps