Using Autologin With ThriveCart
Overview
The ActiveMember360 Autologin module allows validated purchasers to autologin to the WordPress ActiveMember360 site using an autologin URL as the Success URL for ThriveCart purchases.
With the settings in place when someone completes a purchase they will then be taken to a customised success page where the links to all the products purchased will be listed. Clicking on any one link that uses a success URL for autologin will automatically log them into your site using ActiveMember360 Autologin.
Upon a successful login the user can be redirected to any desired location within the WordPress site.
When using autologin with ThriveCart, for a validated URL, ActiveMember360 will create/update a contact in ActiveCampaign as required. This includes the creation and storing of a password in ActiveCampaign if one does not already exist.
ActiveMember360 will also create the user within WordPress if they do not already exist. The user will be created with a username matching that of their email address and the WordPress role as specified in WordPress, Settings, General, New User Default Role. The other WordPress user settings will be as detailed within Default WordPress User Settings.
Usage
The URL used for autologin is constructed using your site URL and parameters.
A sample of the URL structure required is as follows:
site_url/?mbr_autologin=my_security_code
Site URL & Parameters
| Site URL | Description |
|---|---|
| site_url | The WordPress site URL where the user is to be automatically logged in. This can be found in WordPress, Settings, General, Site URL. It must be specified exactly as shown there. Default: none. Required: yes. |
| Parameters | Description |
|---|---|
| mbr_autologin | Set to the security code used to validate an autologin. The security code used must be defined as detailed in ActiveMember360, Settings, Security, Security Codes. Default: none. Required: yes. |
| add_tags | One or more tag ID's defined within ActiveCampaign to add to this contact during the auto-login process. If more than one is entered, please separate with commas. Tag ID's can be determined as explained in Determine ActiveCampaign Tag IDs. Default: none. Required: no. |
| remove_tags | One or more tag ID's defined within ActiveCampaign to remove from this contact during the auto-login process. If more than one is entered, please separate with commas. Remove tags are processed before add tags. Tag ID's can be determined as explained in Determine ActiveCampaign Tag IDs. Default: none. Required: no. |
| assign_automations | One or more automation ID's defined within ActiveCampaign to which the contact should be added during the auto-login process. To assign to multiple automations, separate them with commas. Automation ID's can be determined as explained in Determine ActiveCampaign Automation IDs. Default: none. Required: no. |
| remove_automations | One or more automations ID's defined within ActiveCampaign from which the contact should be removed during the auto-login process. To remove from multiple automations, separate them with commas. Remove automations are processed before assign automations. Automation ID's can be determined as explained in Determine ActiveCampaign Automation IDs. Default: none. Required: no. |
| subscribe_lists | One or more list ID's defined within ActiveCampaign to which the contact should be subscribed during the auto-login process. To subscribe to multiple lists, separate them with commas. List ID's can be determined as explained in Determine ActiveCampaign List IDs. Default: none. Required: no. |
| unsubscribe_lists | One or more list ID's defined within ActiveCampaign from which the contact should be unsubscribed during the auto-login process. To unsubscribe from multiple lists, separate them with commas. Unsubscribes are processed before subscribes. List ID's can be determined as explained in Determine ActiveCampaign List IDs. Default: none. Required: no. |
| default_pass | A default password to be set for all users who do not yet have a password in their ActiveCampaign contact record. Default: none. Required: no. |
| redir | Sends the user to the URL of your choice after a successful login. To use URL parameters with the redirect URL please refer to Using URL parameters with the Autologin module redir parameter. Default: none. Required: no. |
| nofirstlogin | Ignore First login redirect specified in ActiveMember360, Settings, Login, Page redirect on first login. Permitted values: Any value will ignore first login Default: none. Required: no. |
Example ThriveCart Success URLs Using Autologin URL
In all examples my_security_code must be replaced by a security code defined in ActiveMember360, Settings, Security, Security Codes
We recommend that if within ThriveCart, Product, Behaviour rules you are adding ActiveCampaign tags that permit access to your WordPress site and specific content that you add the same tags when using ActiveMember360 Autologin for the same product. The reason being that ActiveMember360 Autologin is likely to complete processing before the ThriveCart product behaviour rules. Therefore not all data may be in place to allow access to the site and content unless also added by ActiveMember360 Autologin.
- Example 1
- Example 2
This URL will add tag ids 123 and 456 to the contact and upon a successful login the user will either be redirected to the page with the slug product, or if it’s their first login to the page selected in ActiveMember360, Settings, Login, Page redirect on first login:
https://yoursite.com/?mbr_autologin=my_security_code&add_tags=123,456&redir=https://yoursite.com/product
This URL will add tag ids 123 and 456 to the contact and upon a successful login the user will either be redirected to the page with the slug product:
https://yoursite.com/?mbr_autologin=my_security_code&add_tags=123,456&nofirstlogin=yes&redir=https://yoursite.com/product
Configuration & Settings:
-
Login to your ThriveCart application.
-
Ensure that within ThriveCart, Settings, Legal & compliance, Exclude PII Setup, Exclude PII from the query string data passed to my success URLs is NOT checked.
-
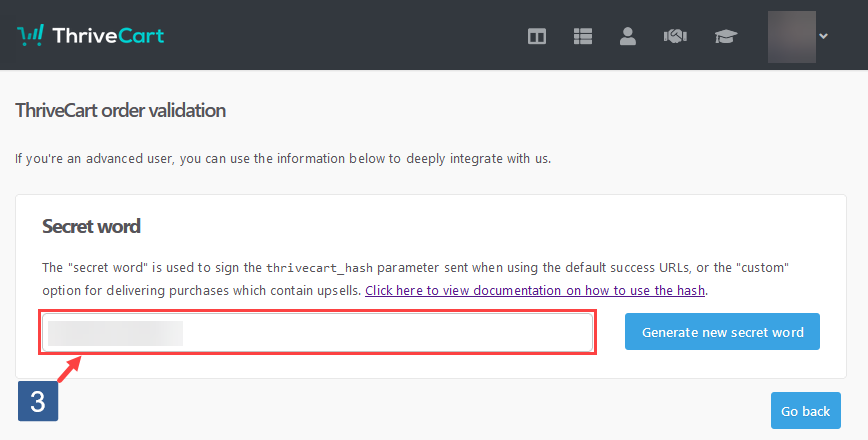
From within ThriveCart, Settings, API & webhooks, ThriveCart order validation copy the Secret word.
-
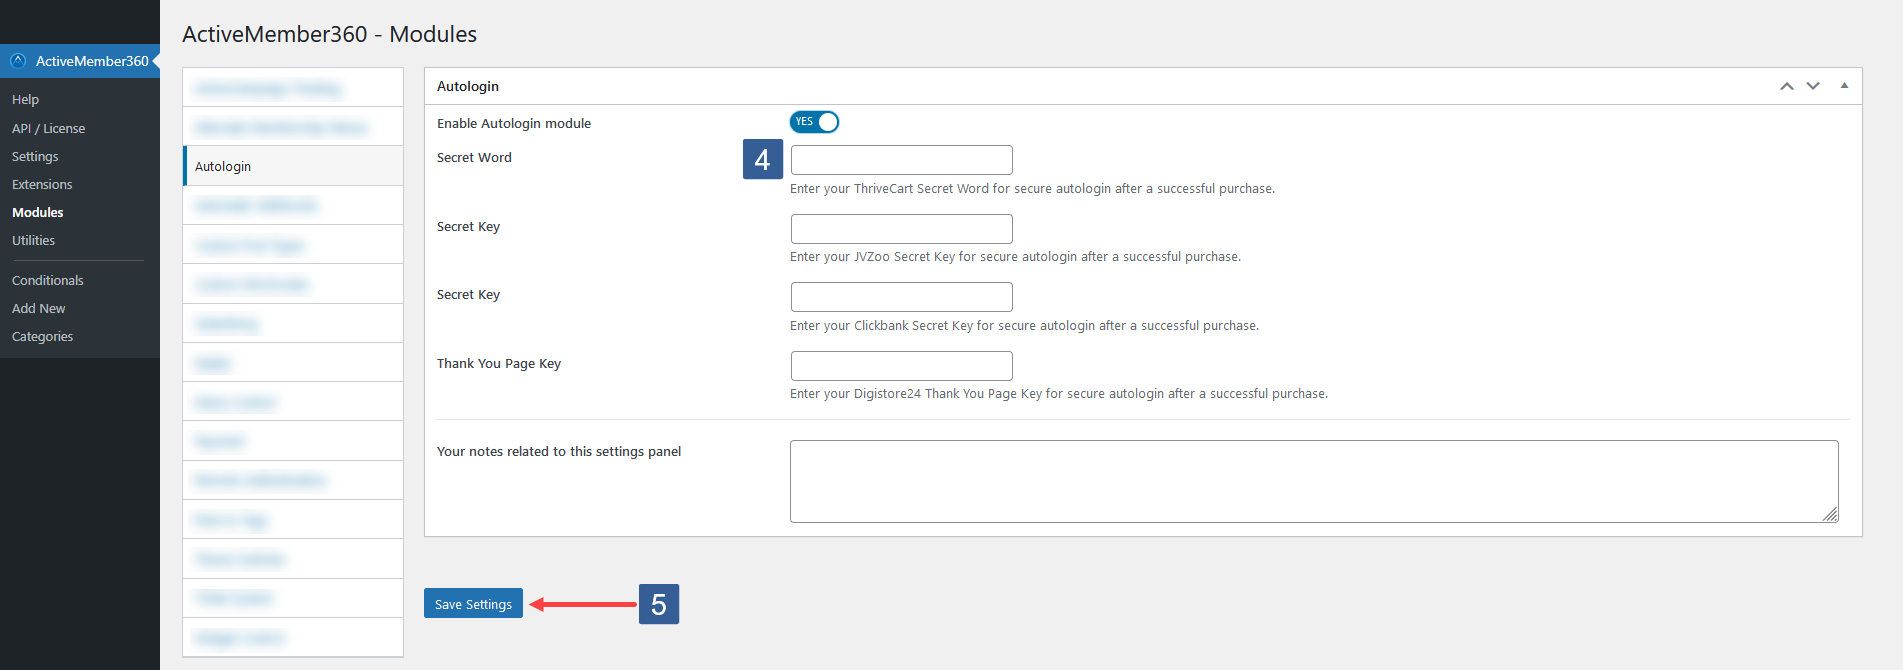
Within WordPress ActiveMember360, Modules, Autologin paste the Secret word from step 3 into the ThriveCart, Secret Word
-
Click Save Settings.
-
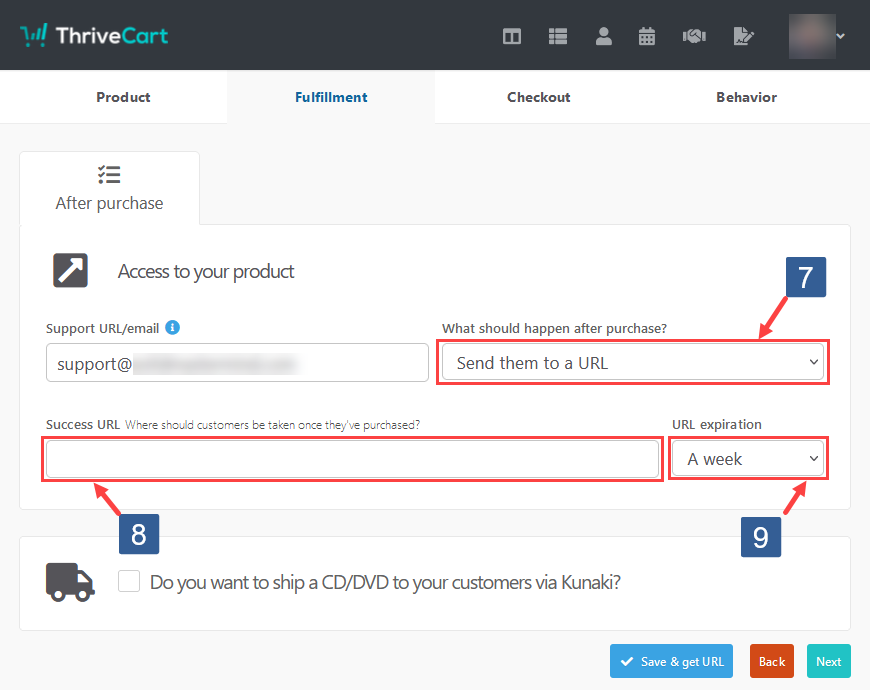
Then within ThriveCart for the product where you wish to use autologin after a successful purchase navigate to Fulfillment.
-
In the What should happen after purchase drop down select "Send them to a URL".
-
In the Success URL input area enter your autologin URL. See Examples for example use cases.
-
In the URL expiration drop down select for how long the "Success URL" will be valid.
If you are using a bump offer with your product ensure that in the "Success URL for your bump offer" you place your autologin URL for use with the bump offer.
-
Navigate to Checkout.
If using cart type Legacy having selected your cart type for the Success page ensure When purchase is complete is set to "Show customisable success page".
If using cart type New carts having selected your cart type go to Design, Launch Editor. Then for Success Page, Page Options, When purchase is complete select "Show customizable success page". Click Save and exit.
-
Click Save and get URL.