Translating ActiveMember360
When using ActiveMember360 the text presented to an end user can be translated using two different methods.
Rather than actually translating text these methods can also be used to customise the ActiveMember360 messaging shown in the default language.
Translating Shortcodes and Block Editor Blocks
Certain ActiveMember360 shortcodes and WordPress Block Editor blocks provide parameters/settings for specifying the required text in whatever language you desire. This includes button text, input field labels and placeholders, headings etc. dependent upon the shortcode or block.
ActiveMember360 Shortcodes:
- mbr_automation
- mbr_email_change
- mbr_list
- mbr_login_form
- mbr_member_dir
- mbr_my_account
- mbr_page_list
- mbr_password_change
- mbr_password_send
- mbr_popup_inline
- mbr_popup_inliner
- mbr_redirect
- mbr_tag
- mbr_texpand
and ActiveMember360 Block Editor Blocks:
Translating Other Messages & Output
One of the easiest ways to translate ActiveMember360 end user messaging into your site’s own language, over and above that of shortcodes and blocks, is to use the WordPress plugin Loco Translate by Tim Whitlock. This is available from within the WordPress repository and is installed in the same way as any repository plugin.
This free plugin provides on-site, in-browser translation capabilities for ActiveMember360 (and many other plugins or themes) on your site, eliminating the need to upload files via FTP / SFTP and creating the path/directories to the correct file locations.
The translation process is as follows:
Translation Setup & Initial Translation Process
-
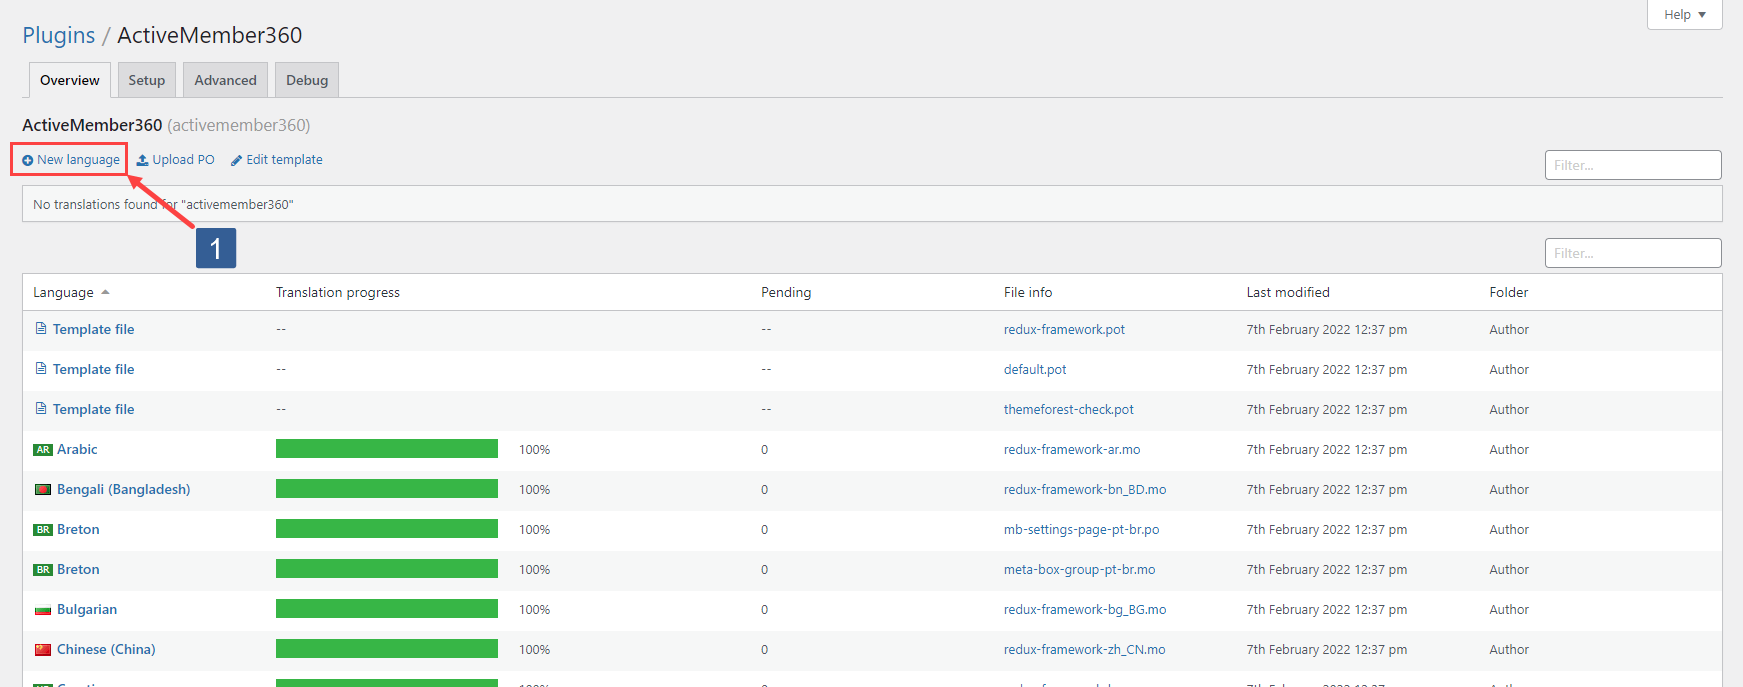
From the Loco Translate Home page select ActiveMember360.
Select New Language.
-
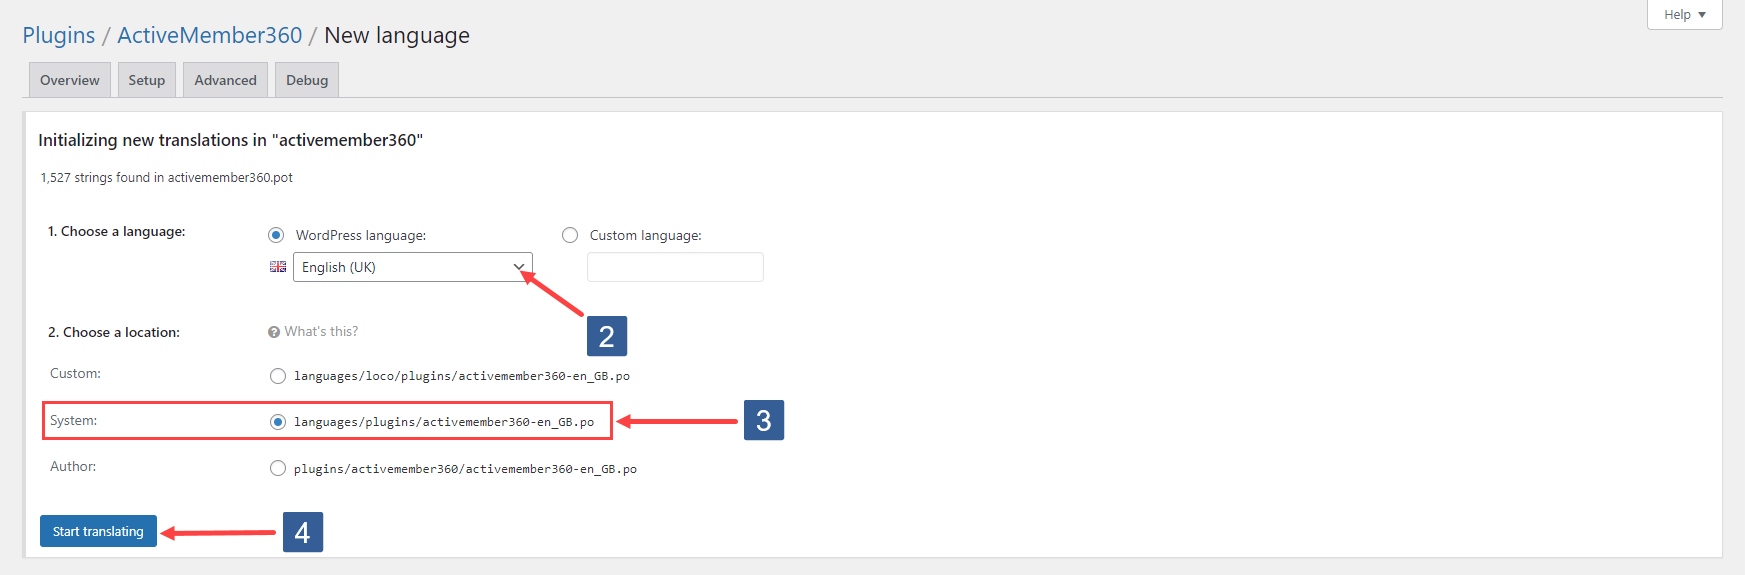
From the Choose a language dropdown select the language for which you wish to create translations.
-
Ensure that Choose a location is selected as System.
ImportantThis setting must be as detailed i.e. System. This ensures the translation files are placed in the WordPress directory
wp-content/languages/pluginswhich is compulsory for ActiveMember360 translations. -
Click Start Translating.
-
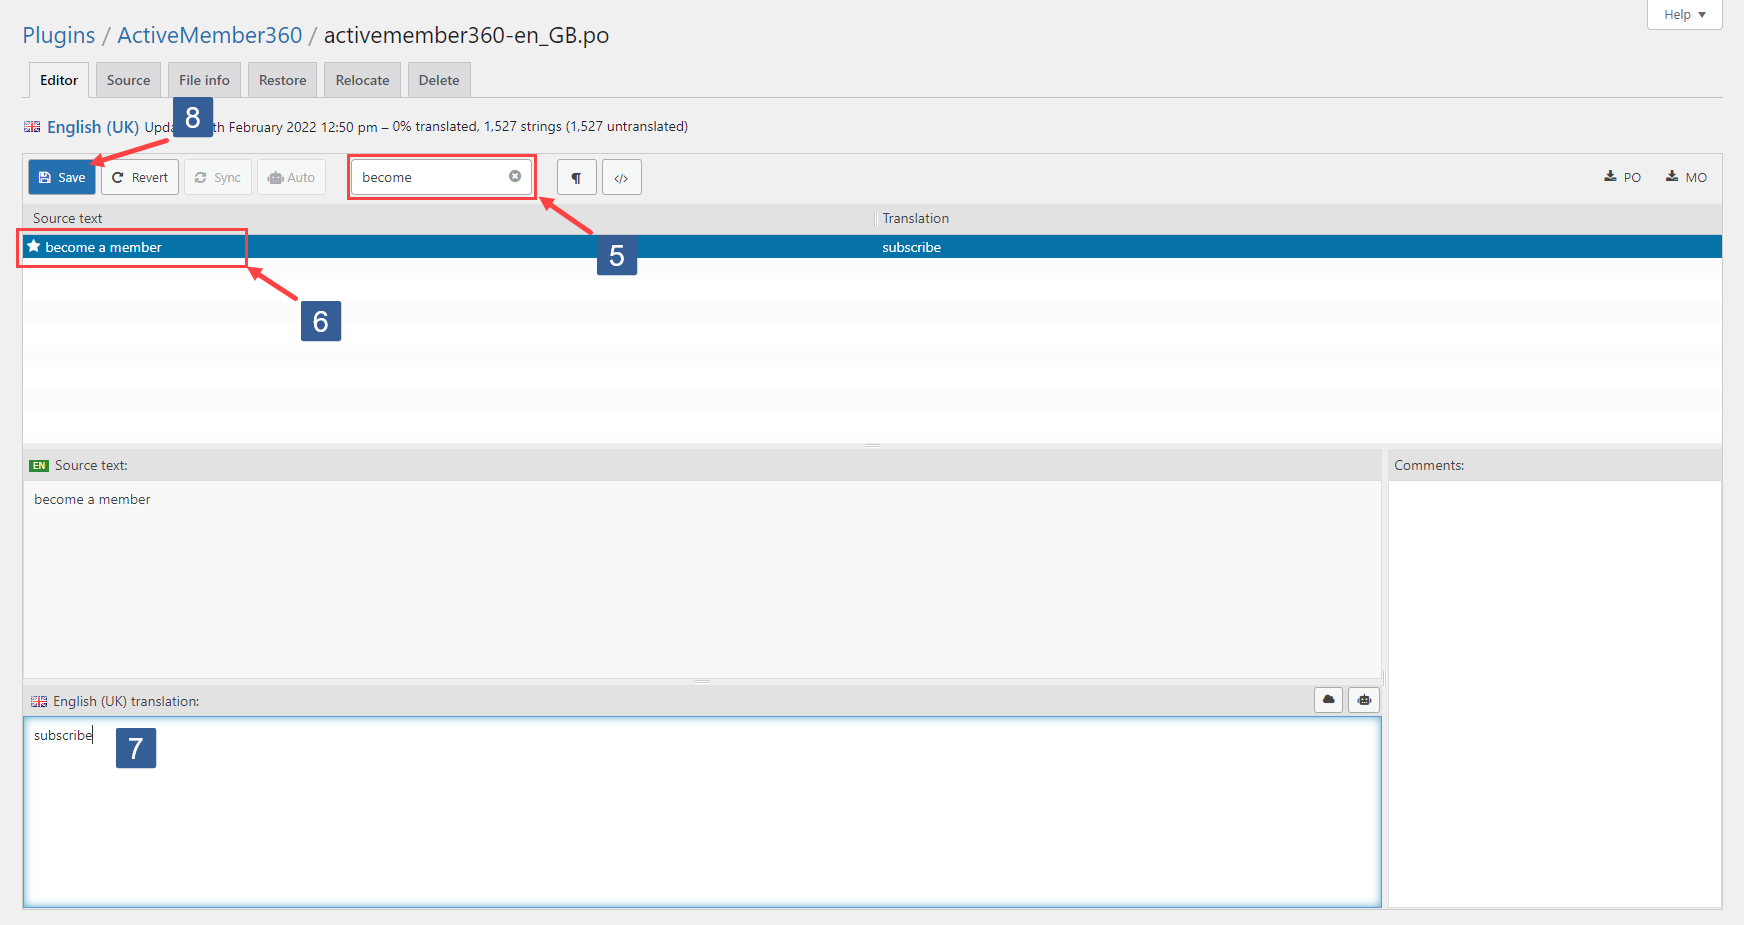
Specify your Filter translation text i.e. search the text to translate.
-
From the found text strings in Source text select the text string to translate.
-
Within Translation enter your required translated text.
-
Click Save
Repeat steps 5 to 8 as required.
Adding Additional Translation Text
If you need to modify or add further translation text for a specific previously defined/chosen language follow these steps:
-
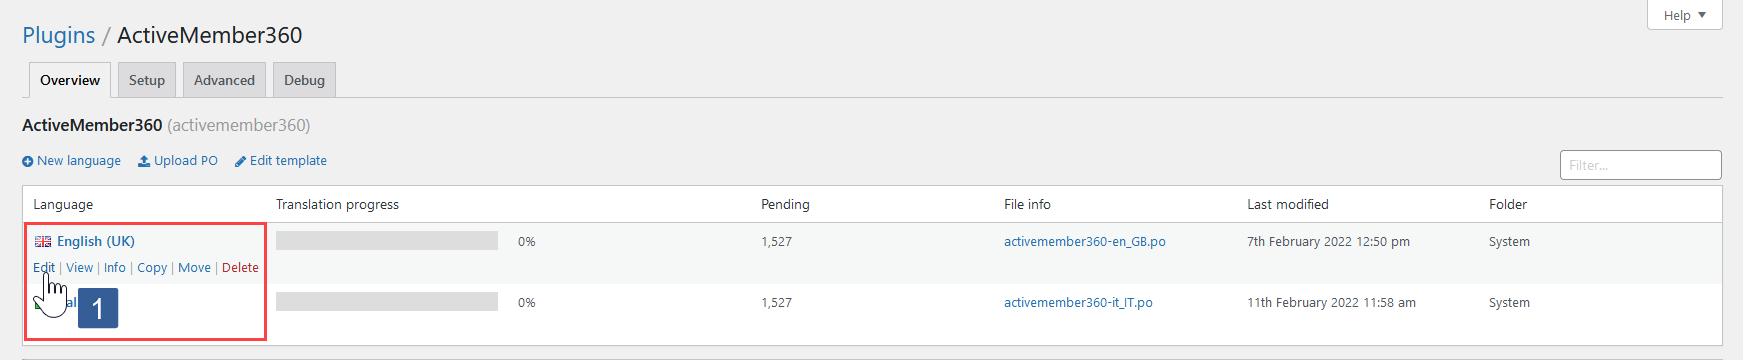
From the Loco Translate Home page select ActiveMember360.
Select the required translation language.

-
Specify your Filter translation text i.e. search the text to translate.
-
From the found text strings in Source text select the text string to translate.
-
Within Translation enter your required translated text.
-
Click Save
Repeat steps 2 to 5 as required.