Thrive Architect Extension

Thrive Architect Overview
Thrive Architect is a WordPress page builder designed to make developing WordPress websites simple yet flexible.
Thrive Architect enables the building of WordPress content layouts in much the same way as that of other page builders such as Elementor.
ActiveMember360 Thrive Architect Extension Overview
ActiveMember360 operates with Thrive Architect without any need for the ActiveMember360 Thrive Architect Extension. All features of ActiveMember360 work with Thrive Architect including shortcodes.
The ActiveMember360 Thrive Architect Extension is used solely to control the display of Thrive Architect Elements. This enables sophisticated controls for the use of dynamic content, personalization and segmentation.
The ActiveMember360 Thrive Architect Extension provides an unsurpassed level of integration between ActiveCampaign and your WordPress site using Thrive Architect.
The Thrive Architect Display Conditions will be enhanced by ActiveMember360 Thrive Architect Extension based upon:
- Contact list status:
- Contact is active in any or all of the lists selected
- Contact is unconfirmed in any or all of the lists selected
- Contact is unsubscribed in any or all of the lists selected
- Contact is bounced in any or all of the lists selected
- Contact tag status:
- Contact has any or all of the tags selected
- Contact does not have any or all of the tags selected
- Contact field comparison:
- Contact has a contact field that compares with a value
- Contact has a contact field that compares with another of their contact fields
- User login status:
- User is logged in
- User is not logged in
- User has failed payment status
- It is the user’s first login
- User role status:
- User has any or all of the roles selected
- User does not have any or all of the roles selected
- PHP statement:
- Any WordPress conditional statement
- Any WooCommerce conditional statement
- Predefined conditional
- GamiPress User status:
- User has any or all of the achievements selected
- User does not have any or all of the achievements selected
- User has any or all of the ranks selected
- User does not have any or all of the ranks selected
- User has a points type total that compares with a value
- Learndash User status:
- User is enrolled in any or all of the courses selected
- User is not enrolled in any or all of the courses selected
- User has not started any or all of the courses selected
- User has in progress any or all of the courses selected
- User has completed any or all of the courses selected
- User has not completed any or all of the lessons selected
- User has completed any or all of the lessons selected
- User has not completed any or all of the topics selected
- User has completed any or all of the topics selected
- WooCommerce User status:
- User has purchased any or all of the products selected
- User has not purchased any or all of the products selected
- User has pending status for any or all of the subscriptions selected
- User has active status for any or all of the subscriptions selected
- User has on hold status for any or all of the subscriptions selected
- User has pending cancellation status for any or all of the subscriptions selected
- User has cancelled status for any or all of the subscriptions selected
- User has expired status for any or all of the subscriptions selected
- …any multiples and combinations of the above.
Activate Thrive Architect Extension
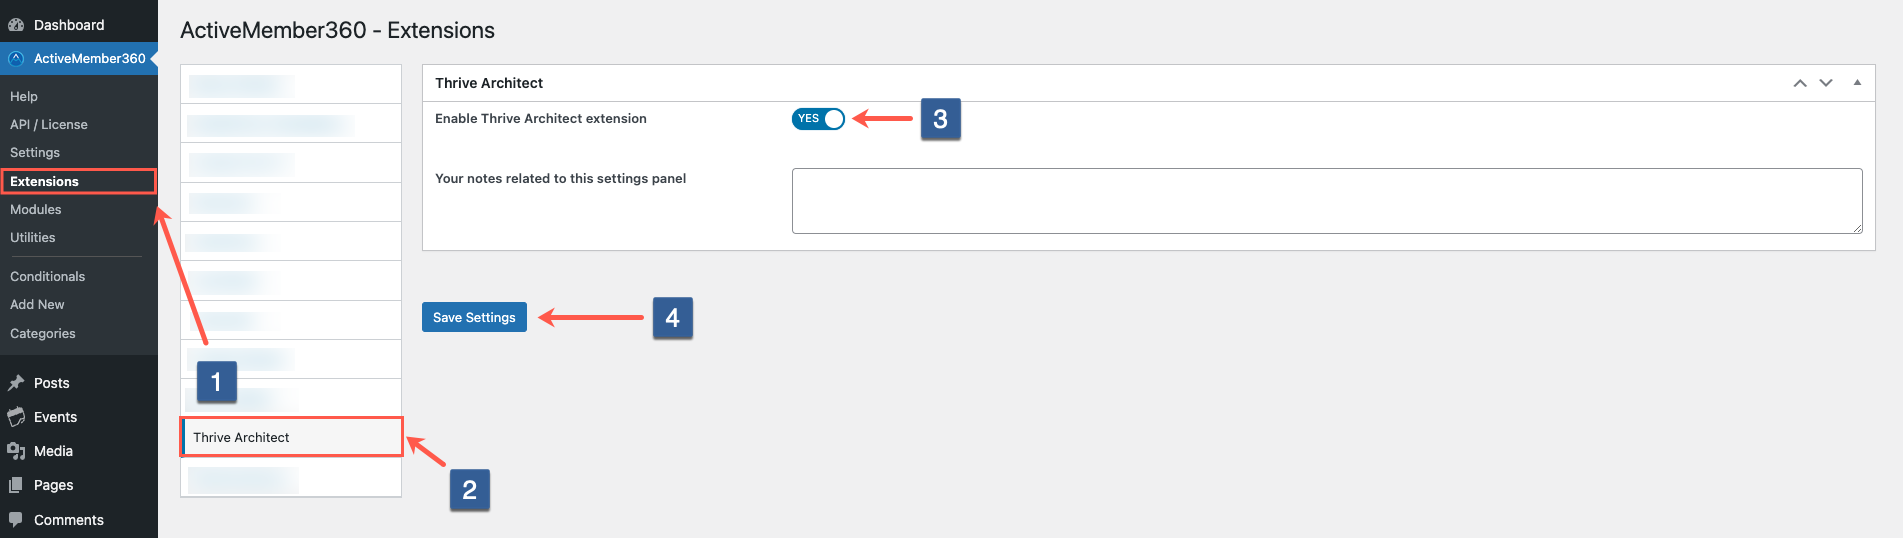
- In WordPress administrator main navigation click ActiveMember360, Extensions.
- In ActiveMember360 Extensions tabs click Thrive Architect.
- Set Enable Thrive Architect Extension to Yes.
- Click Save Settings.
Open Thrive Architect Display Conditions To Show/Hide Thrive Architect Elements
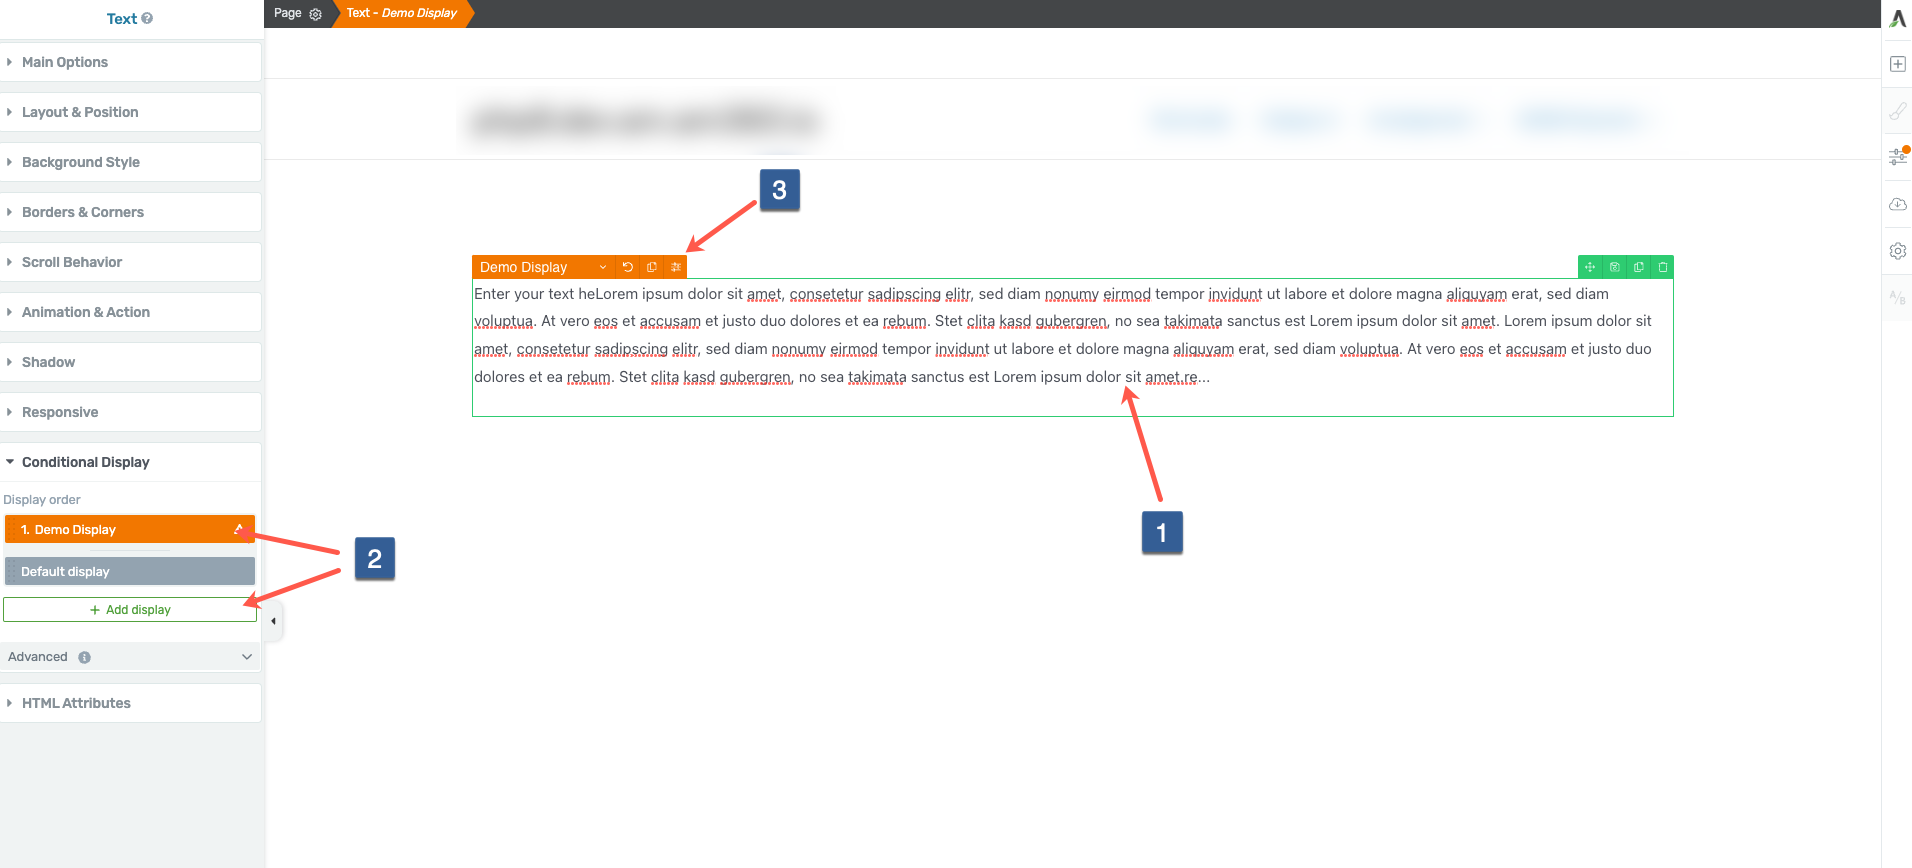
Steps for opening the Thrive Architect Display Conditions
- Click on the element you wish to set a display condition for.
- Click on the display you want to set a condition for or add a new display first.
- Click on the settings icon of the display.
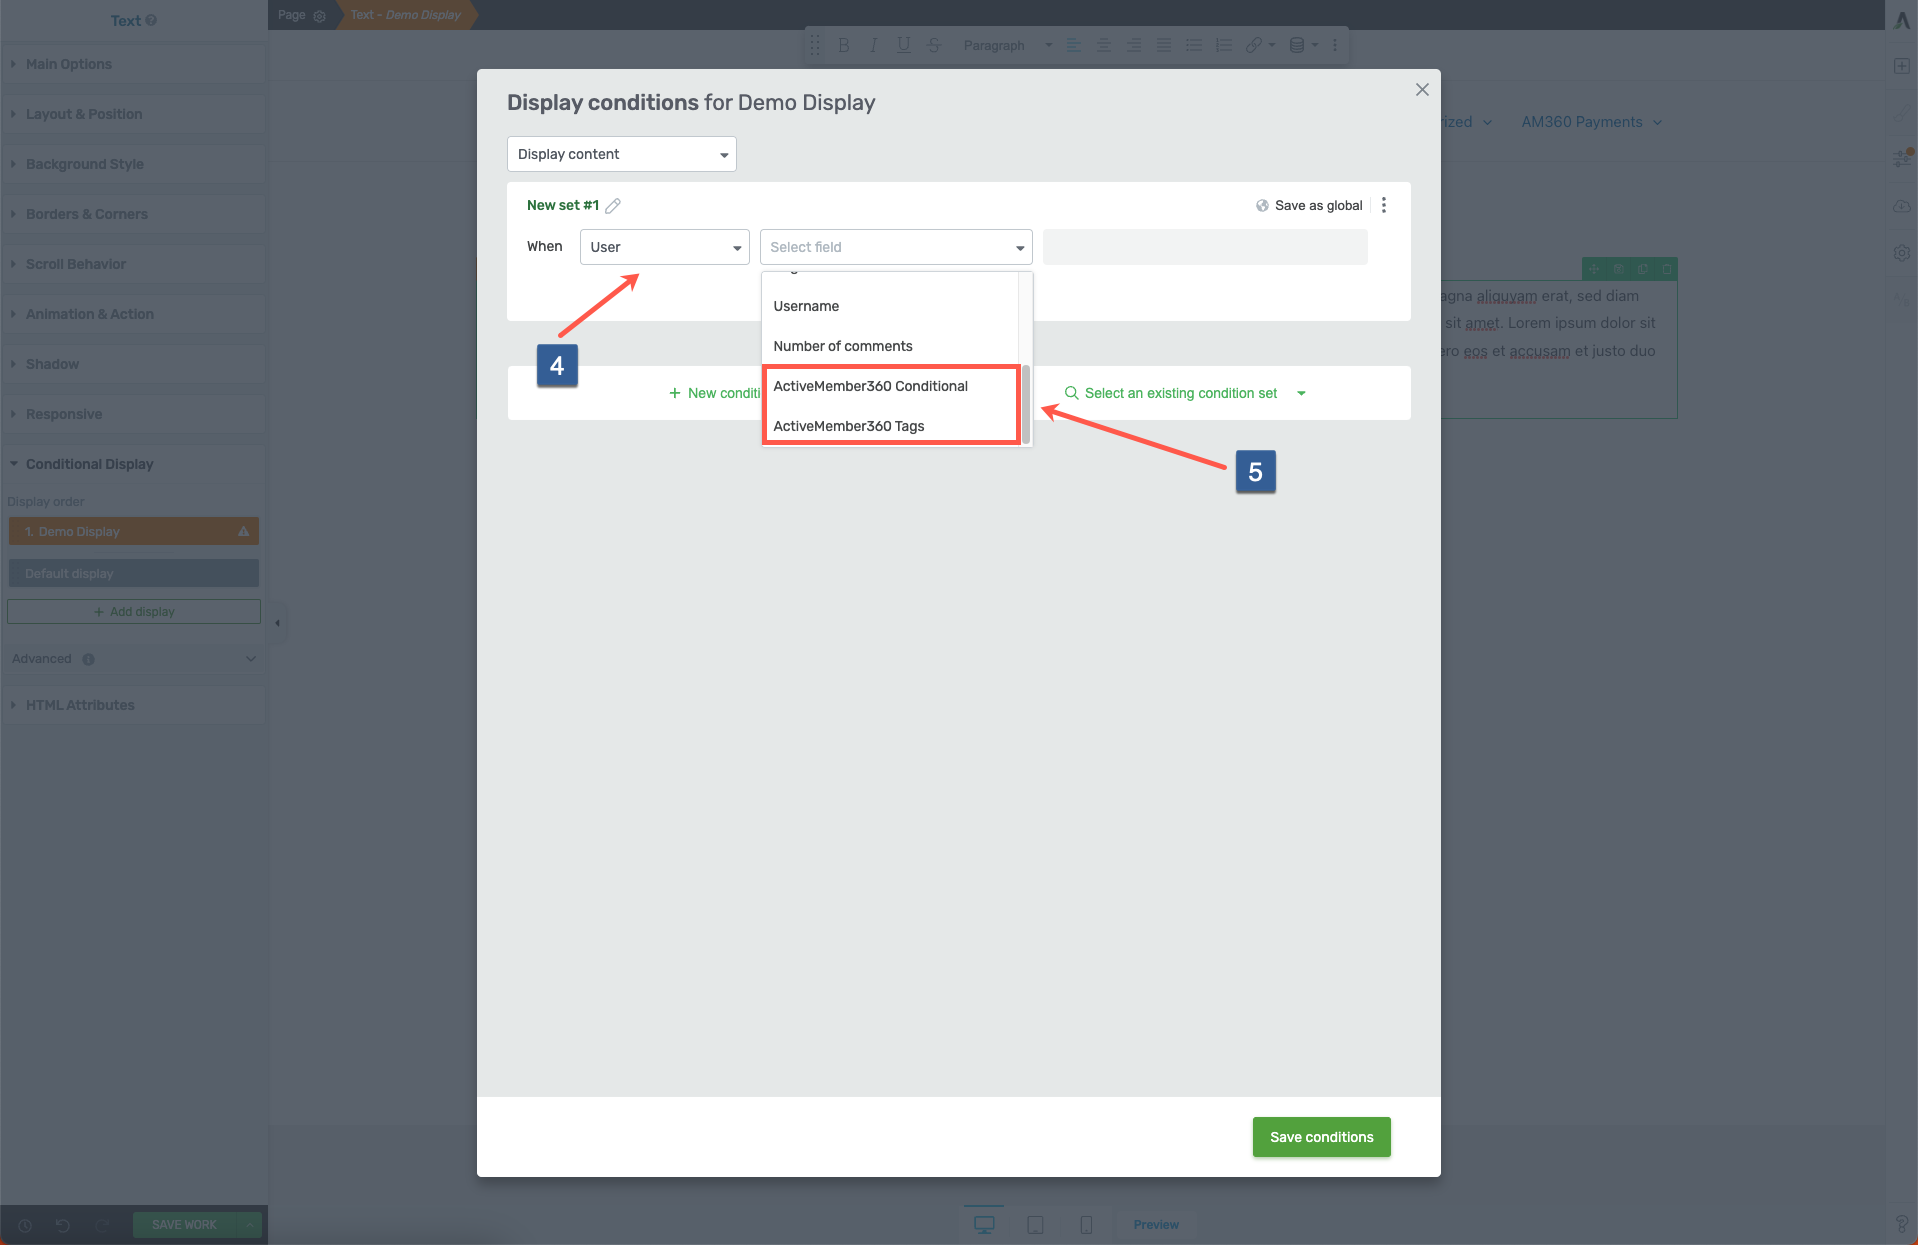
Select ActiveMember360 conditions
-
Select the User entity in the first dropdown.
-
From the Select field drop down select ActiveMember360 Conditional or ActiveMember360 Tags
NoteElement visibility can be controlled using two distinct methods with ActiveMember360.
We would always recommend using ActiveMember360 Conditional as it provides the greatest flexibility regarding the conditions available to control the display of the element for personalization and segmentation purposes.
Adding/defining a Conditional is detailed at Adding Conditionals.
ActiveMember360 Tags is primarily available to provide backward compatibility for element display conditions defined prior to Conditionals being introduced.
For ActiveMember360 Conditional
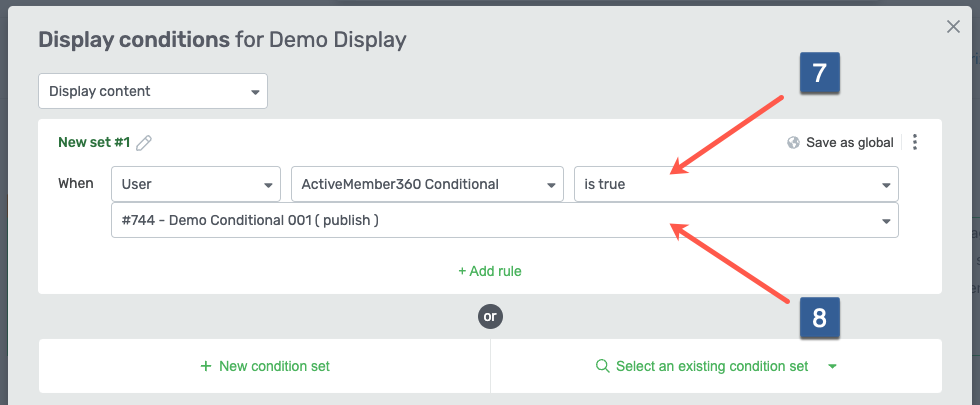
Steps for specifying display conditions for Thrive Architect based upon a conditional
- From drop down select whether the conditional needs to evaluate as True or False to display the element.
- Select the required conditional to be evaluated.
- Once the settings have been completed ensure Save conditions is clicked to save the configuration.
For ActiveMember360 Tags
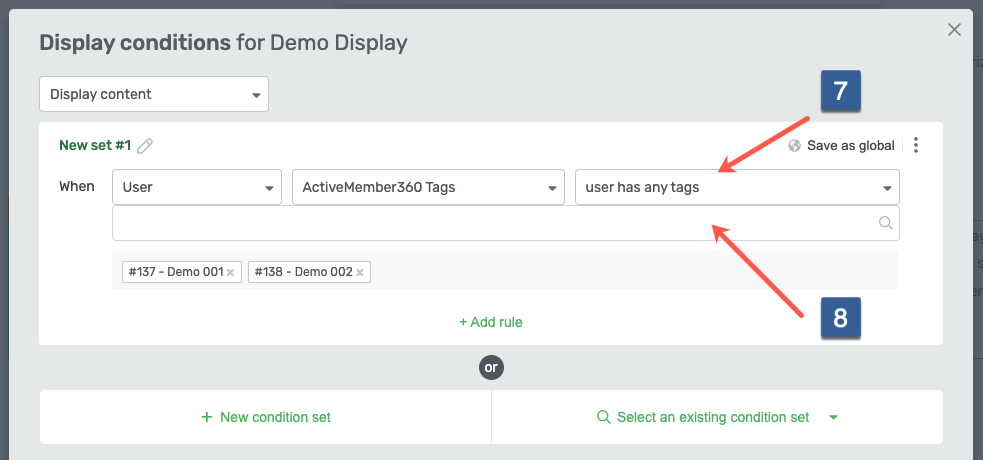
Steps for specifying display conditions for Thrive Architect based upon the contact has/has not specific tags
- From the drop down select whether user has any tags, user has all tags, user does not have any tags or user does not have all tags of the tags selected should be considered when evaluating the condition for the contact linked to the current logged in user.
- Select the tags to be used when evaluating the condition.
- Once the settings have been completed ensure Save conditions is clicked to save the configuration.