Role To Tags Module
Overview
WordPress by default has six roles: Super Admin, Administrator, Editor, Author, Contributor and Subscriber. The Super Admin role only applies to WordPress multisite installations.
When ActiveMember360 creates a WordPress user it will automatically assign the role set in WordPress, Settings, General, New User Default Role.
WordPress only allows one of the standard WordPress default roles to be assigned to any particular WordPress user.
However WordPress does technically support the idea of more than one role per user. Users and developers of plugins can create their own roles. Examples of this are roles created by bbPress, BuddyPress, LearnDash and WooCommerce.
There may be situations where you wish to control the addition and removal of any third party WordPress user roles based upon ActiveCampaign contact tags.
That is the purpose of the ActiveMember360 Role To Tags module.
It allows roles to be added to or removed from a WordPress user based upon the tags belonging to the associated ActiveCampaign contact.
ActiveMember360 does not define any user roles.
Using ActiveMember360 Role To Tags you cannot add/remove any default WordPress roles for the user. The reasons being:
-
To prevent a situation where the user can accidently, or otherwise, remove all of the WordPress standard roles.
-
As a user can only ever have one of the standard WordPress rules to prevent mapping conflicts.
-
Security regarding the assignment of the admin or super admin role.
So we choose to protect standard WordPress role assignment and do not allow Role to Tag Mapping to add or remove those roles based upon tags. It only functions for third party user roles.
If you wish to modify the default WordPress role of the user you would need to custom program that using the mbr/role/alternate filter.
Activation

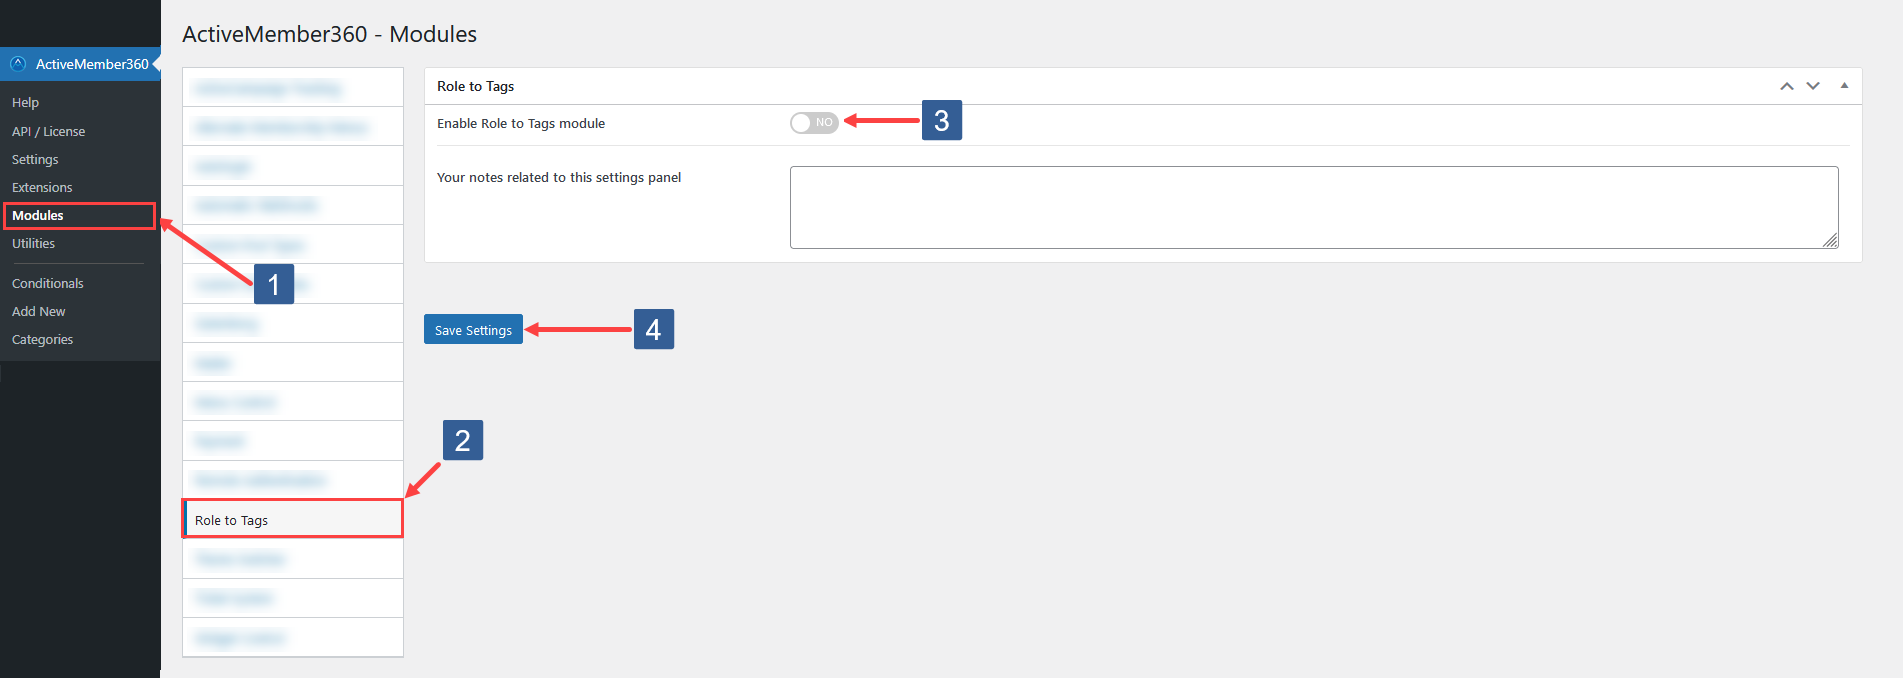
- In WordPress administrator main navigation click ActiveMember360, Modules.
- In ActiveMember360 Modules tabs click Role To Tags.
- Set Enable Role To Tags module to Yes/On.
- Click Save Settings.
Adding Role To Tags

-
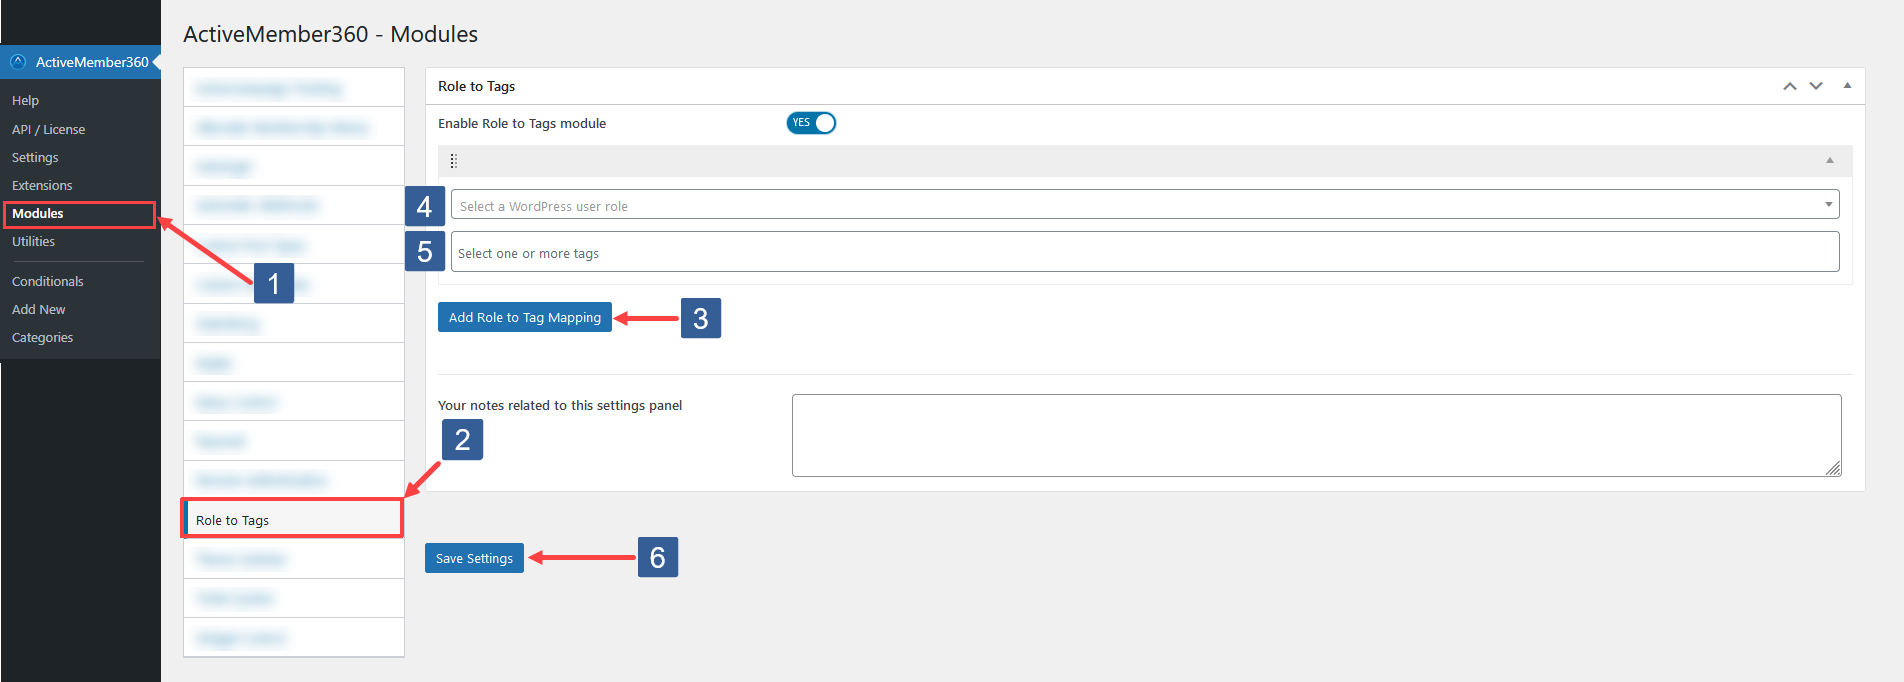
To add a new role to tags mapping in WordPress administrator main navigation click ActiveMember360, Modules.
-
Select the Role To Tags tab.
-
If this is the first ever Role To Tags mapping you have defined for the site continue to step 4 or otherwise click on Add Role To Tag Mapping.
-
From the Select a WordPress user role drop down select the role to be controlled by the selected ActiveCampaign contact tags.
It is only possible to select a single role to map. If you wish to map multiple roles using the same tags please define additional Role To Tags mappings.
The name of the role selected automatically determines the name given to the mapping.
-
From the Select one or more tags drop down select the ActiveCampaign tags that should add the previously selected Select a WordPress user role for the logged in user.
Click the drop down then scroll or start typing any consecutive characters of the contact tag name to refine the list and aid selection.
Then click on the required tag.
Multiple tags can be selected as required.
Individual tags can be removed from the selection by clicking on the x shown next to the individual tag name.
All tags can be removed from the selection by clicking on the x shown in the far right of the drop down.
If the ActiveCampaign contact associated to the WordPress user has ANY of the selected tags the selected WordPress user role will be added to the user.
If the ActiveCampaign contact associated to the WordPress user has NONE of the selected tags the selected WordPress user role will be removed from the user.
The WordPress user role will be added/removed upon login, or for an already logged in remote user immediately ActiveMember360 is notified or determines the change of contact tags and the remote user subsequently performs some action on the site.
As many Role To Tags mappings can be defined as required.
- Once the settings have been completed ensure Save Settings is clicked to save the defined Role To Tags mappings.
Removing Role To Tags Mappings

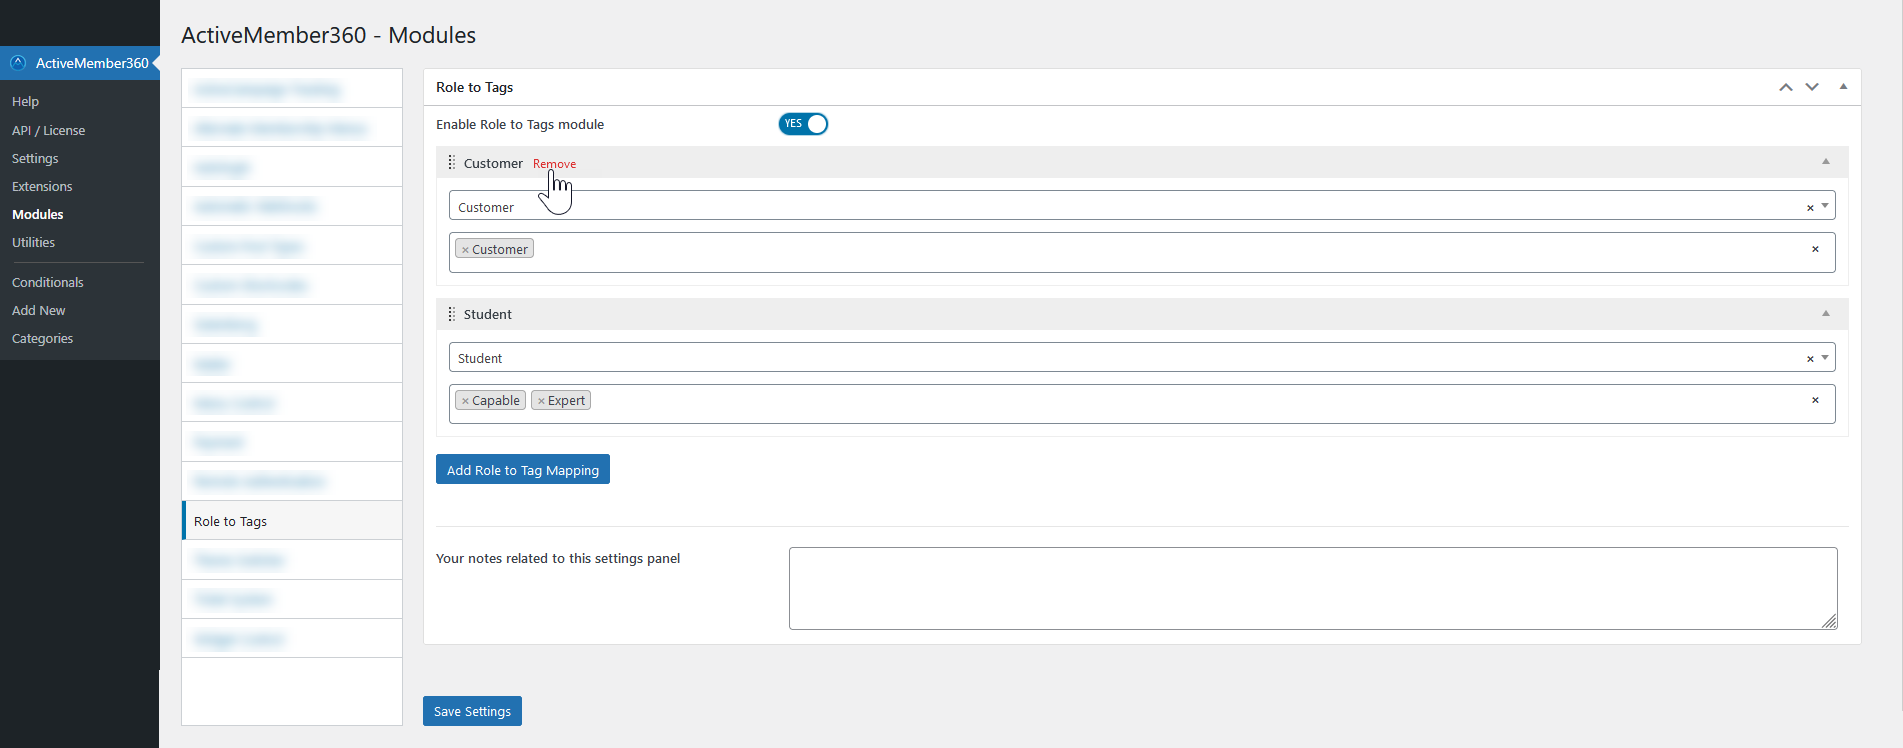
You can remove Role To Tags mappings by moving your cursor into the role/tags mapping title area. A Remove link will then be shown that when clicked will remove the Role To Tags mappings.
The Remove link is only shown if more than one Role To Tags mapping is defined.
Reordering Role To Tags

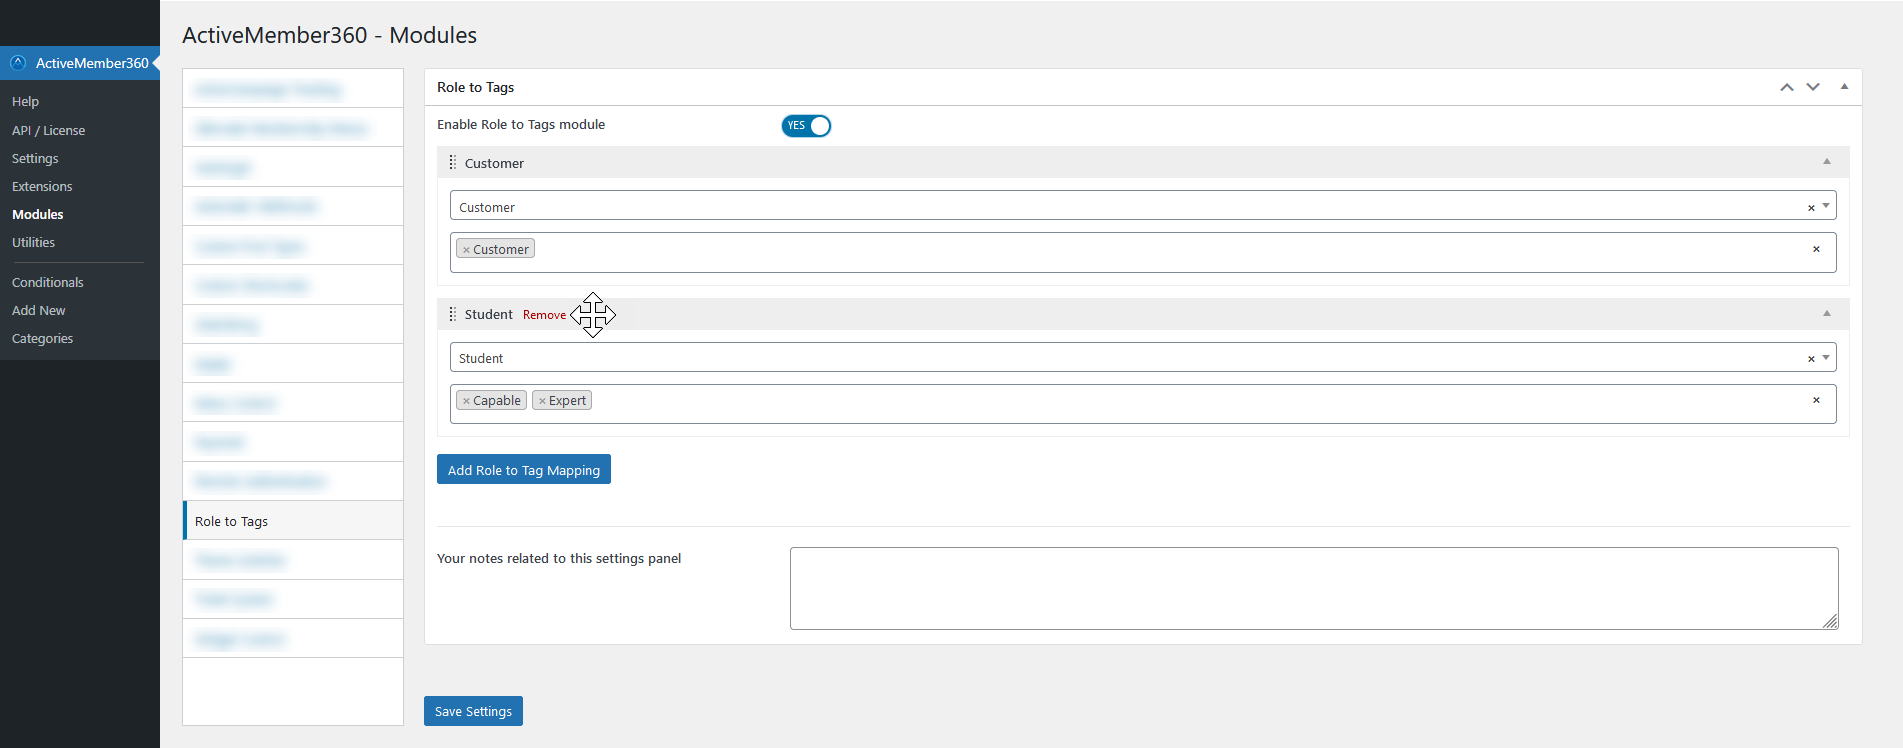
Where multiple Role To Tags mappings have been added/created you can reorder the mappings by moving your cursor into the Role To Tags mapping title area. The cursor will show as a cross-hair and on holding down the left mouse button you can drag the mapping and release to change the order.
Reordering is available to solely aid the management of the Role To Tags mappings defined.